Job Manager
- Job management is a quick, non-milestone job.
Steps
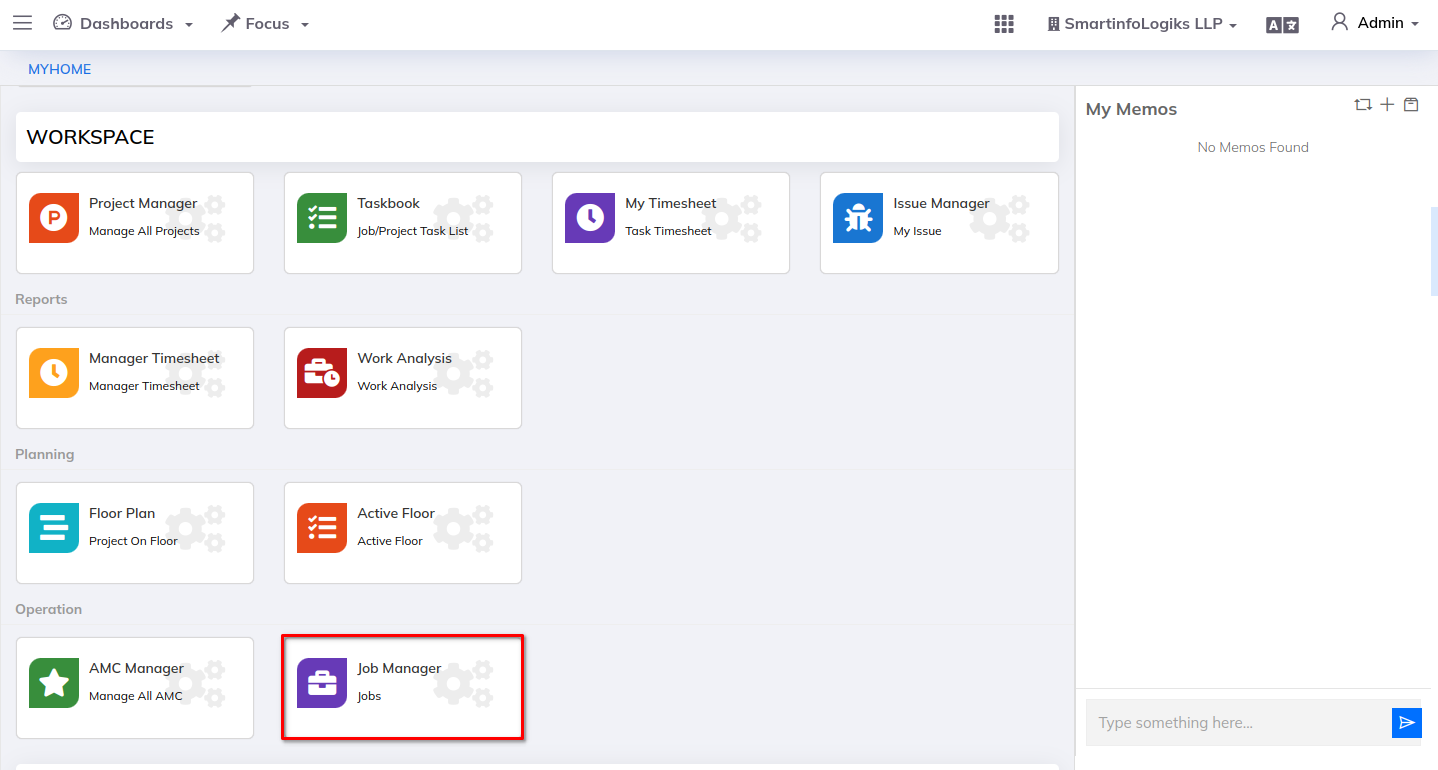
- Goto Workspace then click on the Job Manager
1. Active Jobs:
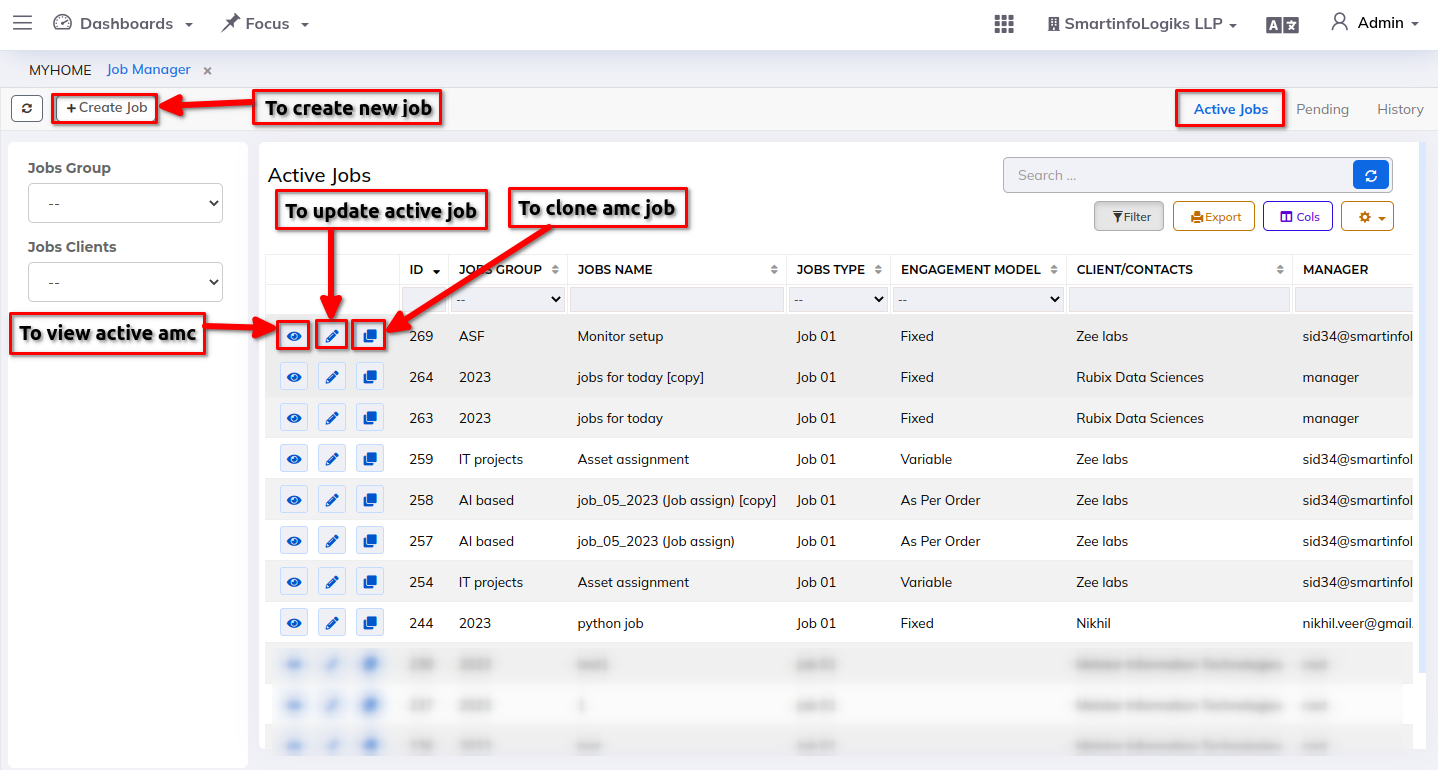
- Active jobs includes job status which are on_track,pending and at risk will be visible in the active tab.
- You can create the new job within the Active tab.
For creating new project please follow the below steps:
Steps:
Step 1: Go to the New Tab.
Step 2: Click on the +Create job button, project creation form will get open as shown in the below image: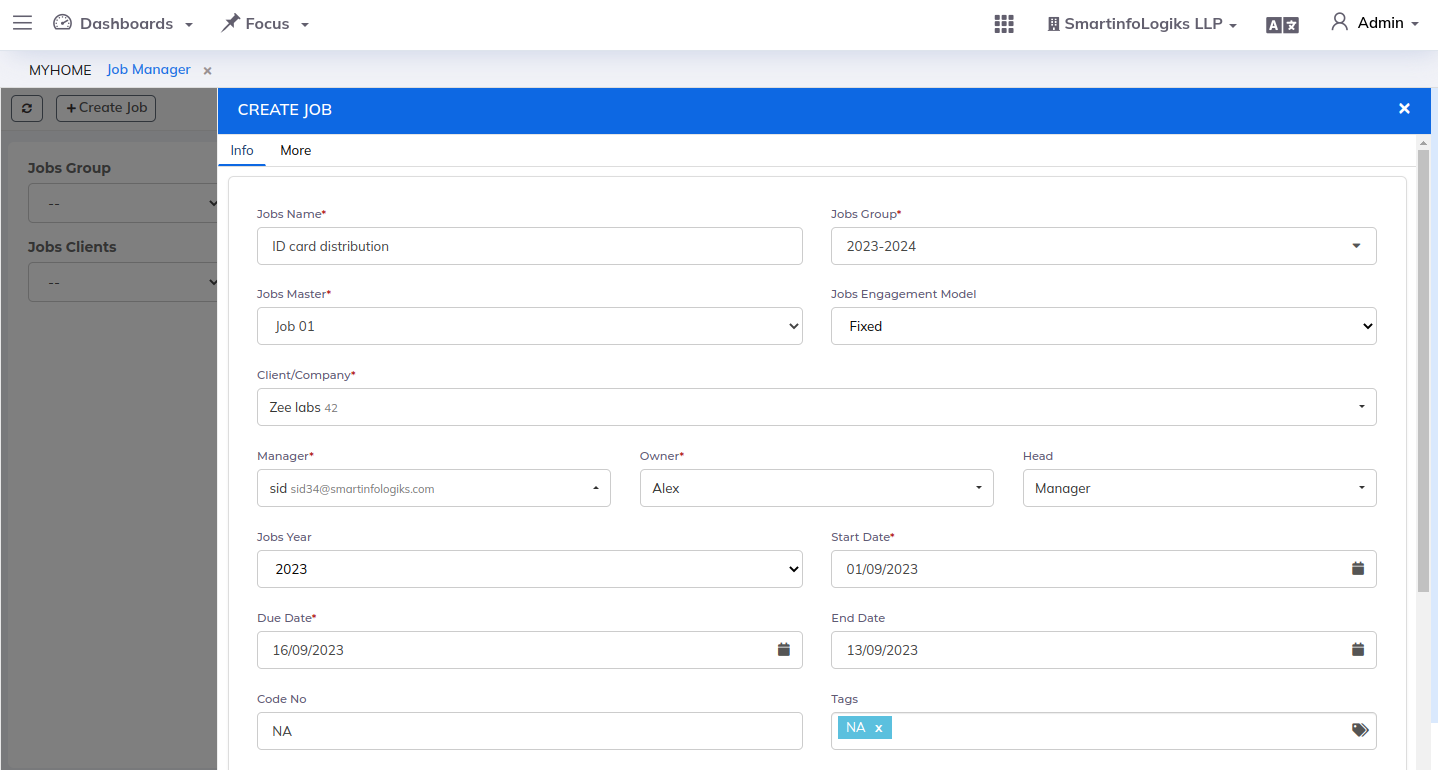
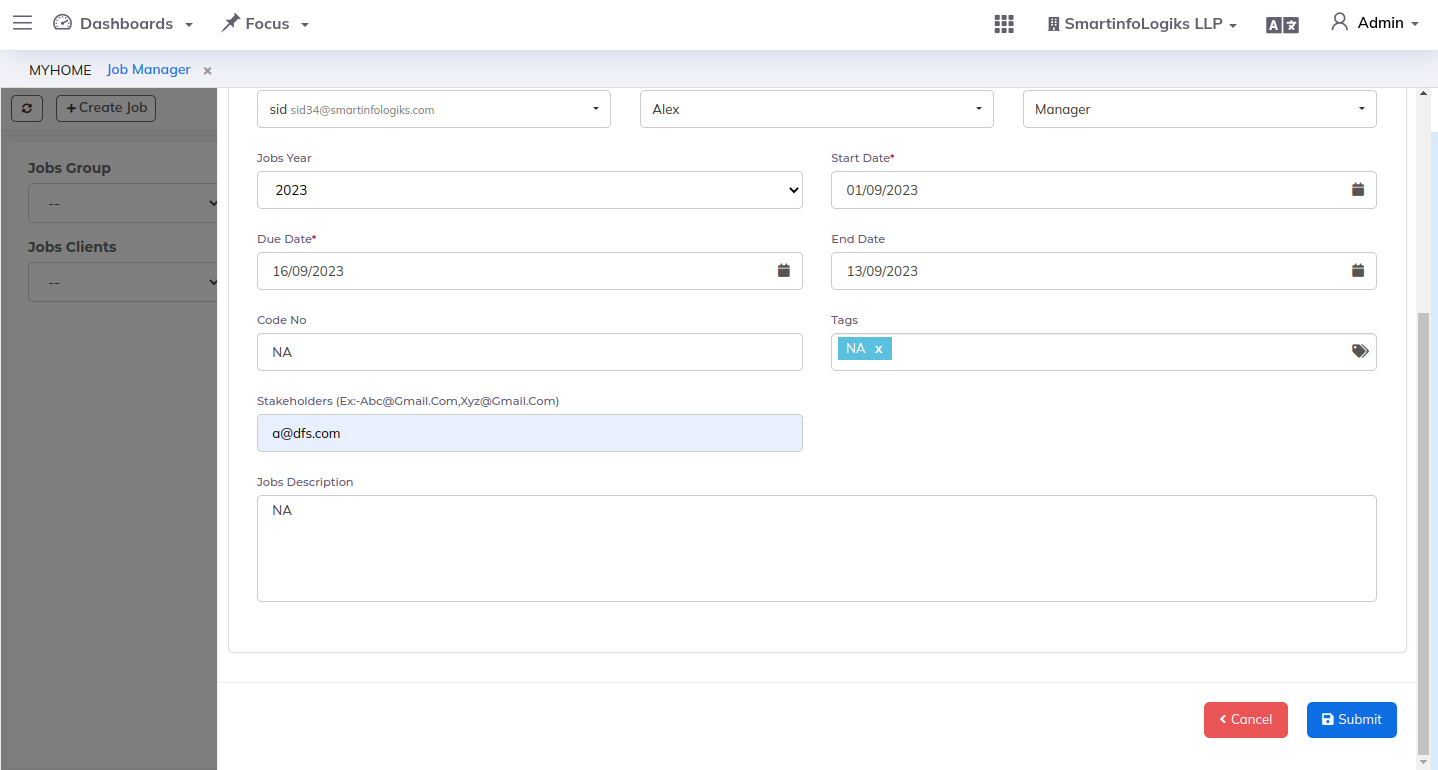
Enter all required details.
1. Jobs Name: Title of the Job
2. Jobs Group: Enter the Jobs group.
3. Jobs Master: Select job master from dropdown.
4. Client/Company: Select name of the client/company.
5. Manager: Select the name of the manager to whom the project is assigned from the dropdown.
6. Owner: The project is assigned to the person who is the owner of the project.
7. Start Date: Select Start date.
8. Due Date: Select the expected due date of the project.Additional details can be add while creating new project:
9. Jobs Engagement Model: Select Project engagement model using dropdown.
10. Jobs Year: Select job year using dropdown.
11. Code No:Enter the code no
12. Tags: Enter the Tags.
13. Stakeholders(Ex:-abc@gmail.com,xyz@gmail.com): Enter the Stakeholders.
14. Jobs Description: you can describe the feature new jobs. Enter the jobs description.
15. Order: Select Order using dropdown.To view job details, click on the View Job icon.
- To update the job details, click on the Edit job icon.
- To allows users to duplicate or replicate an existing job.
2. Pending:
- Jobs which are crossed their due date will be visible under this report.
- Working of this tab is same as active tab only status is displayed as Pending.
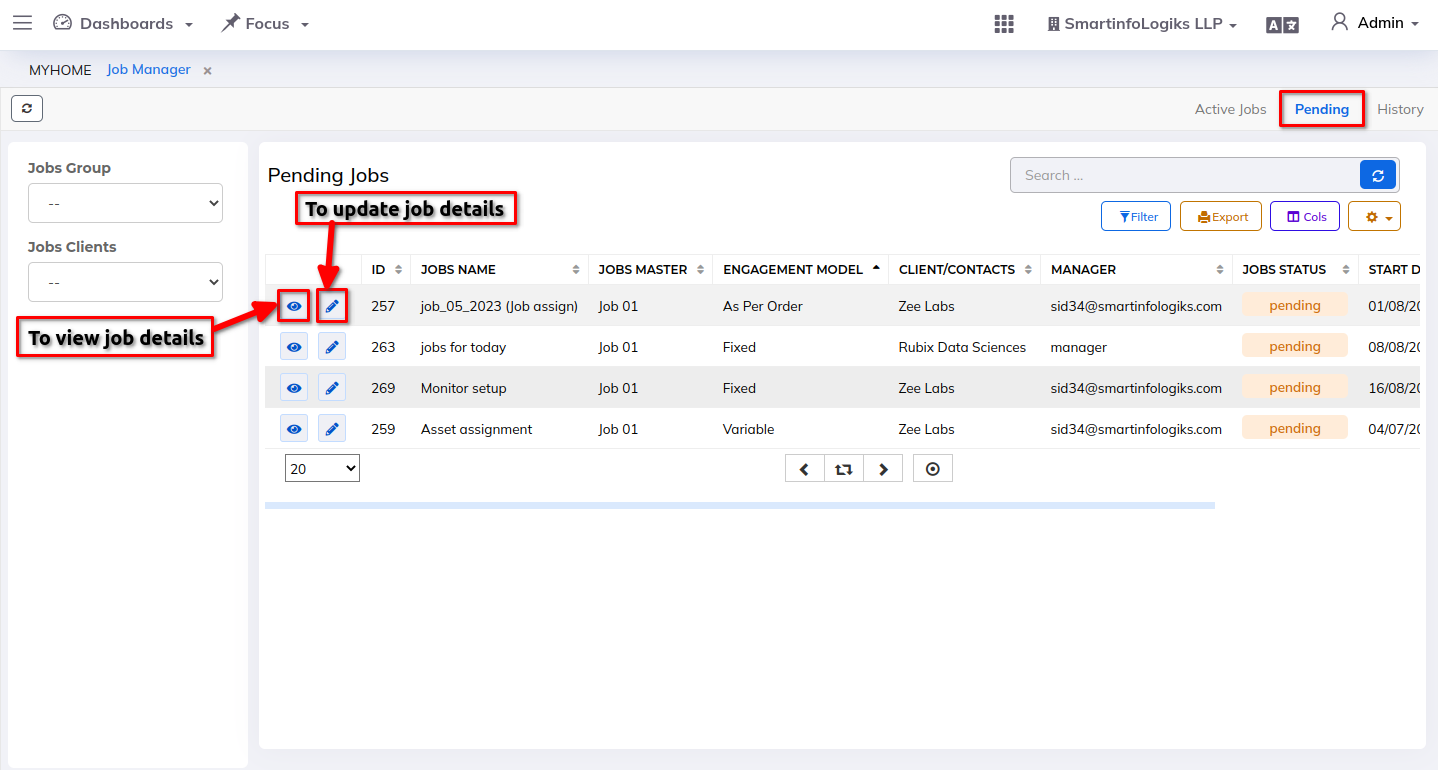
- To view job details, click on the View Job icon.
- To update the job details, click on the Edit Job icon.
3. History:
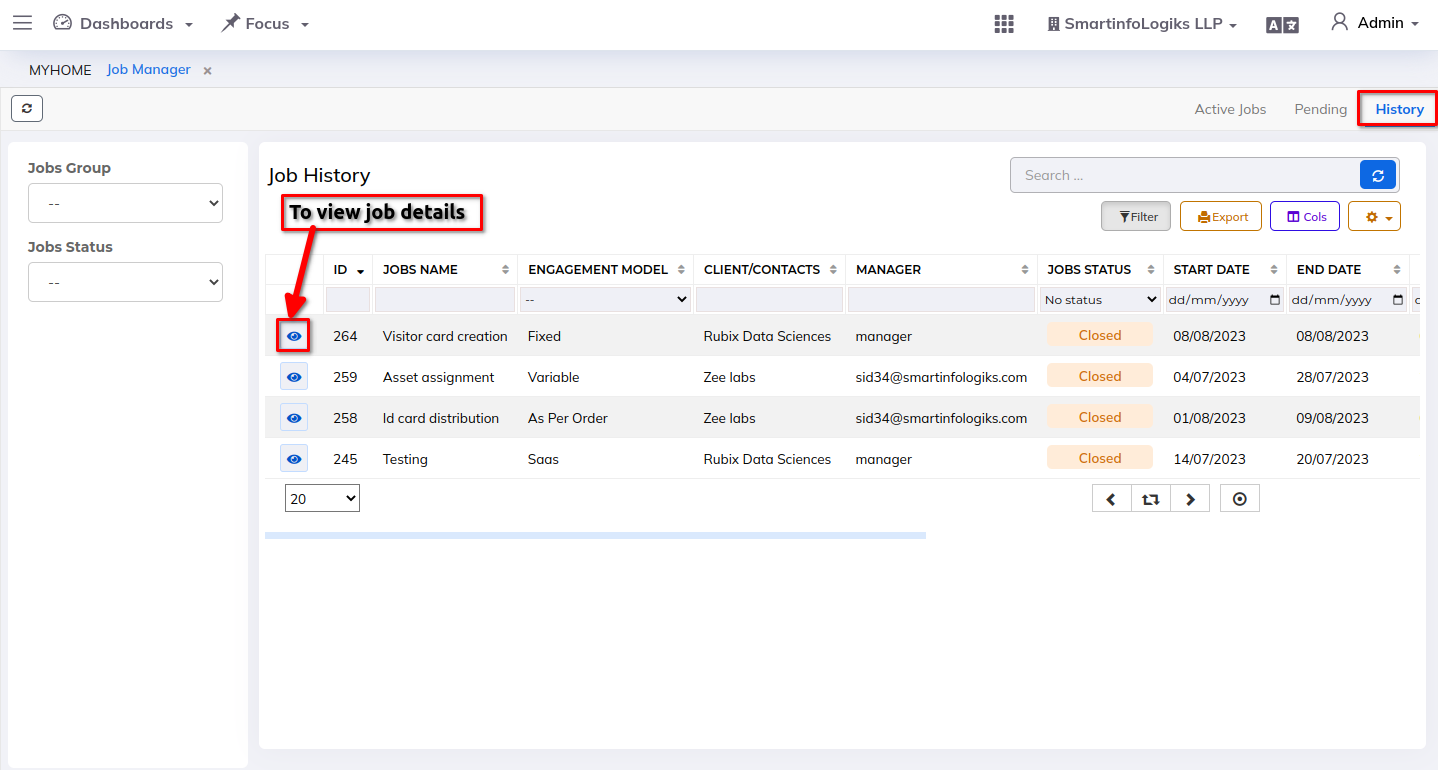
- Jobs which are closed will get stored in the History tab.
- On click of the Jobs history icon, users can view jobs details.
