Campaign
Users can create marketing campaigns within the ERP system. This includes defining campaign parameters such as campaign name, start and end dates, target market segments, and messaging.
Dashboard:-
Steps:
- Go to Marketing Module.
- Click on Campaign.
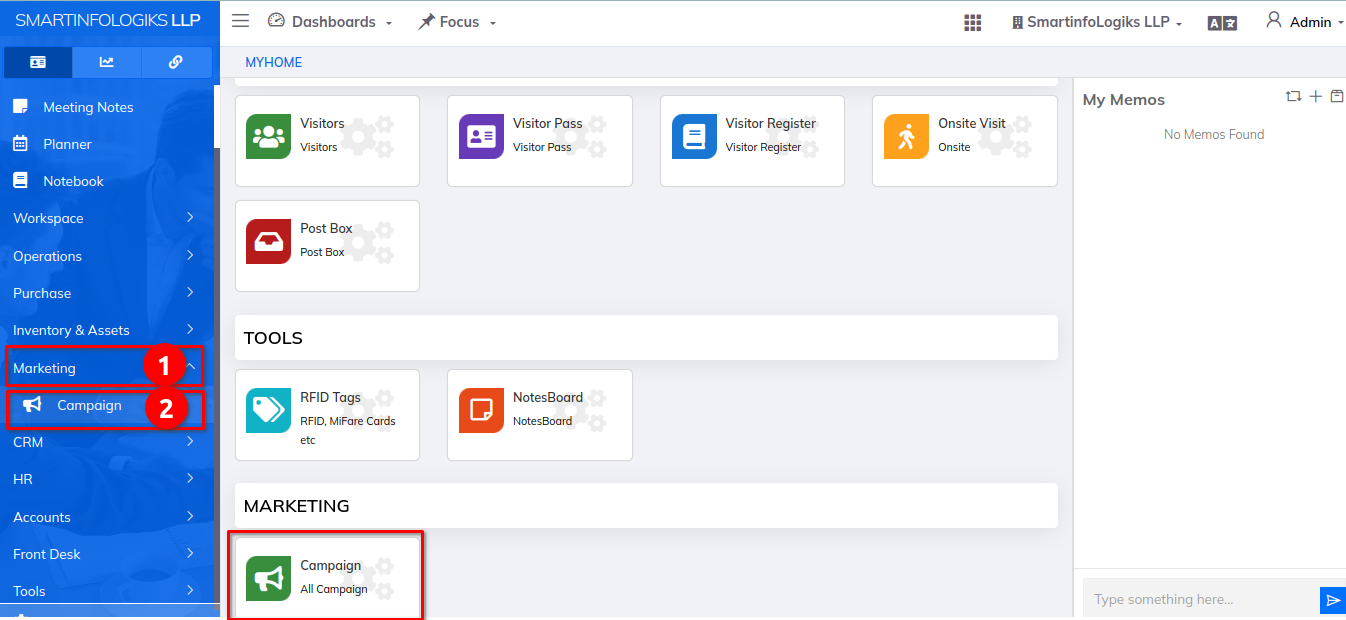
- Campaign module will be shown as below :
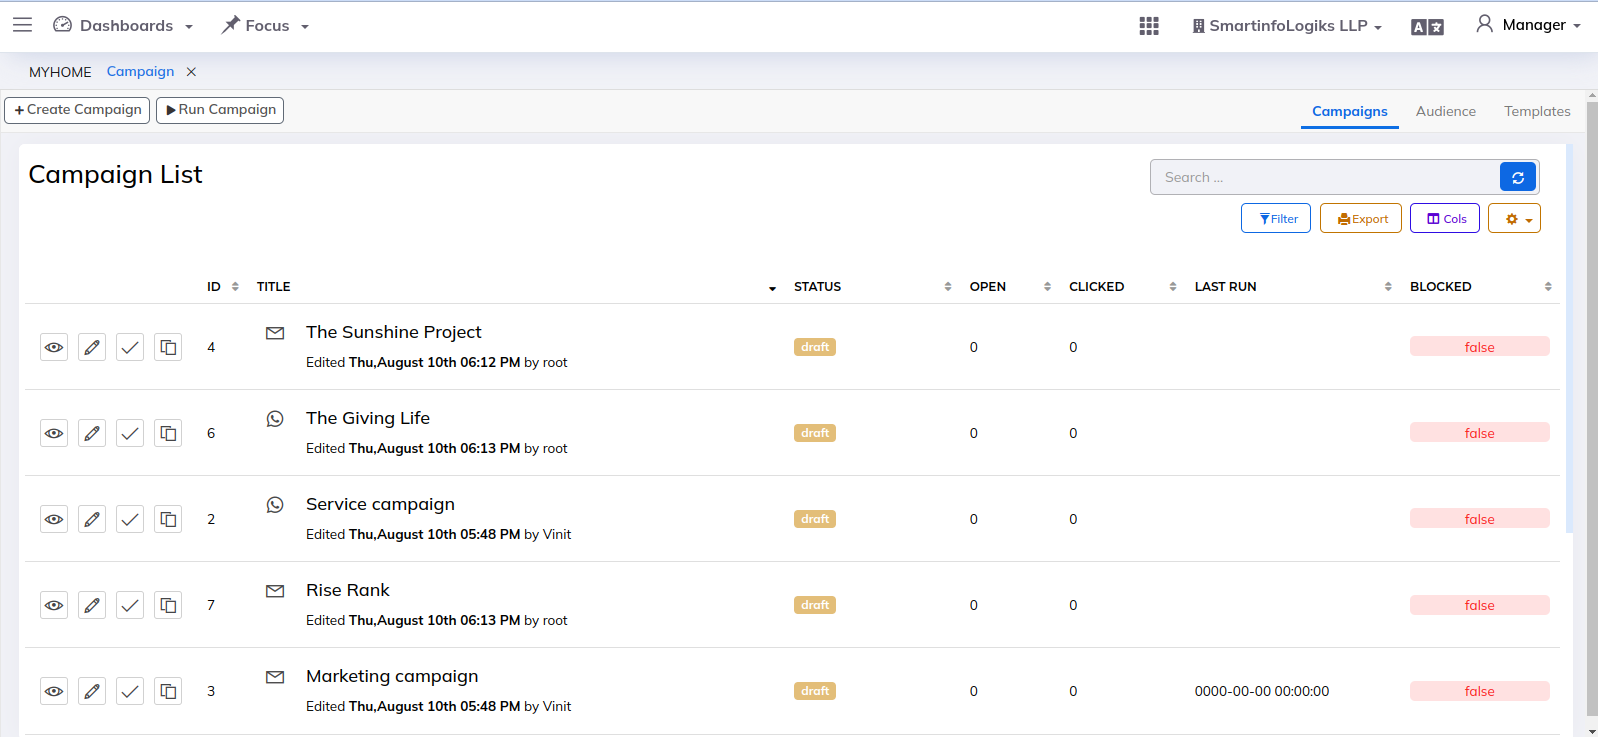
Campaigns Tab:-
When you click on the Campaign module, a list of campaigns appears in the Campaigns tab: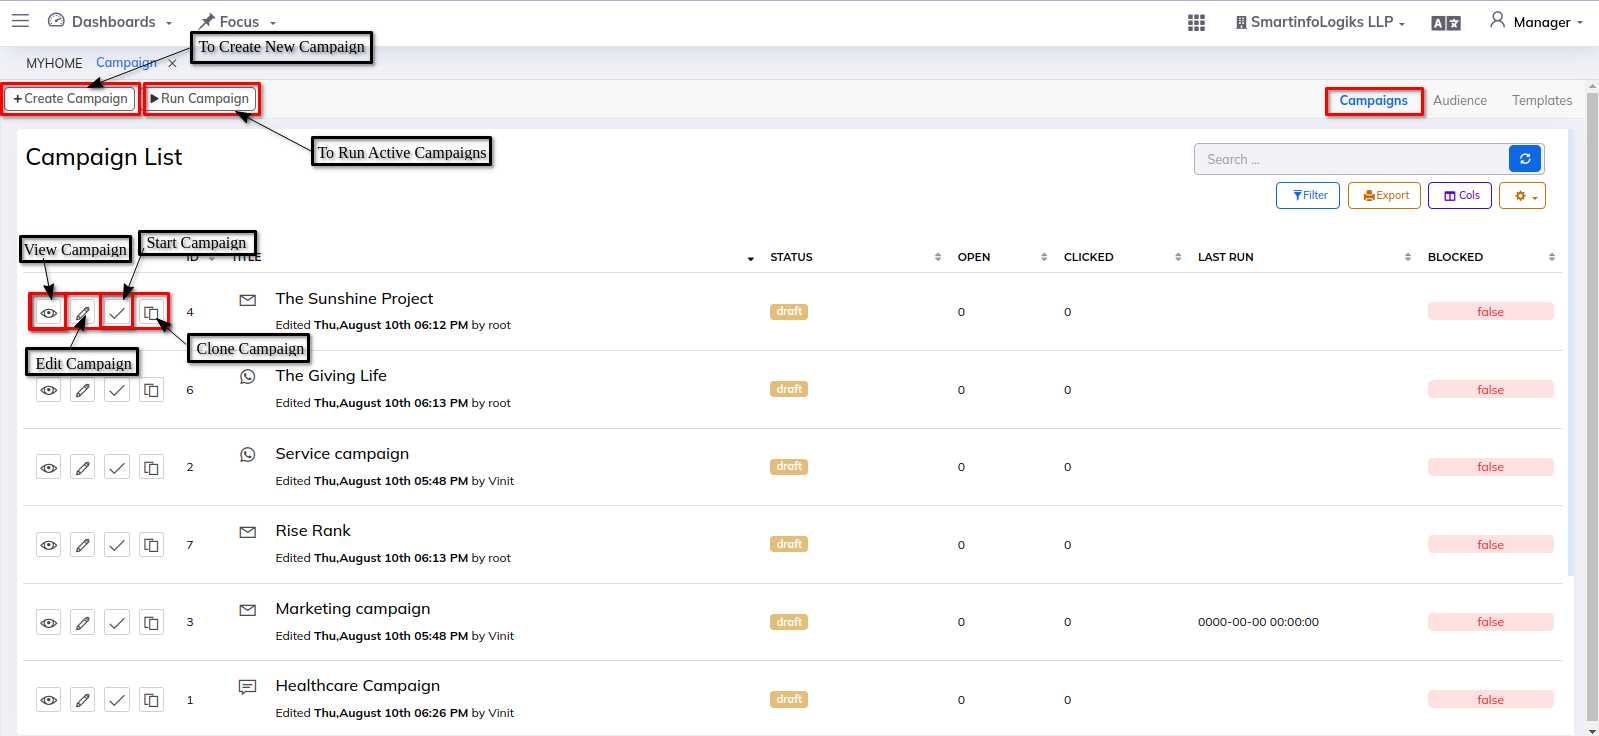
- In Campaigns tab,new Campaigns can be created by clicking on "Create Campaign" button.
- The Add Campaign form will be popped up as shown below :
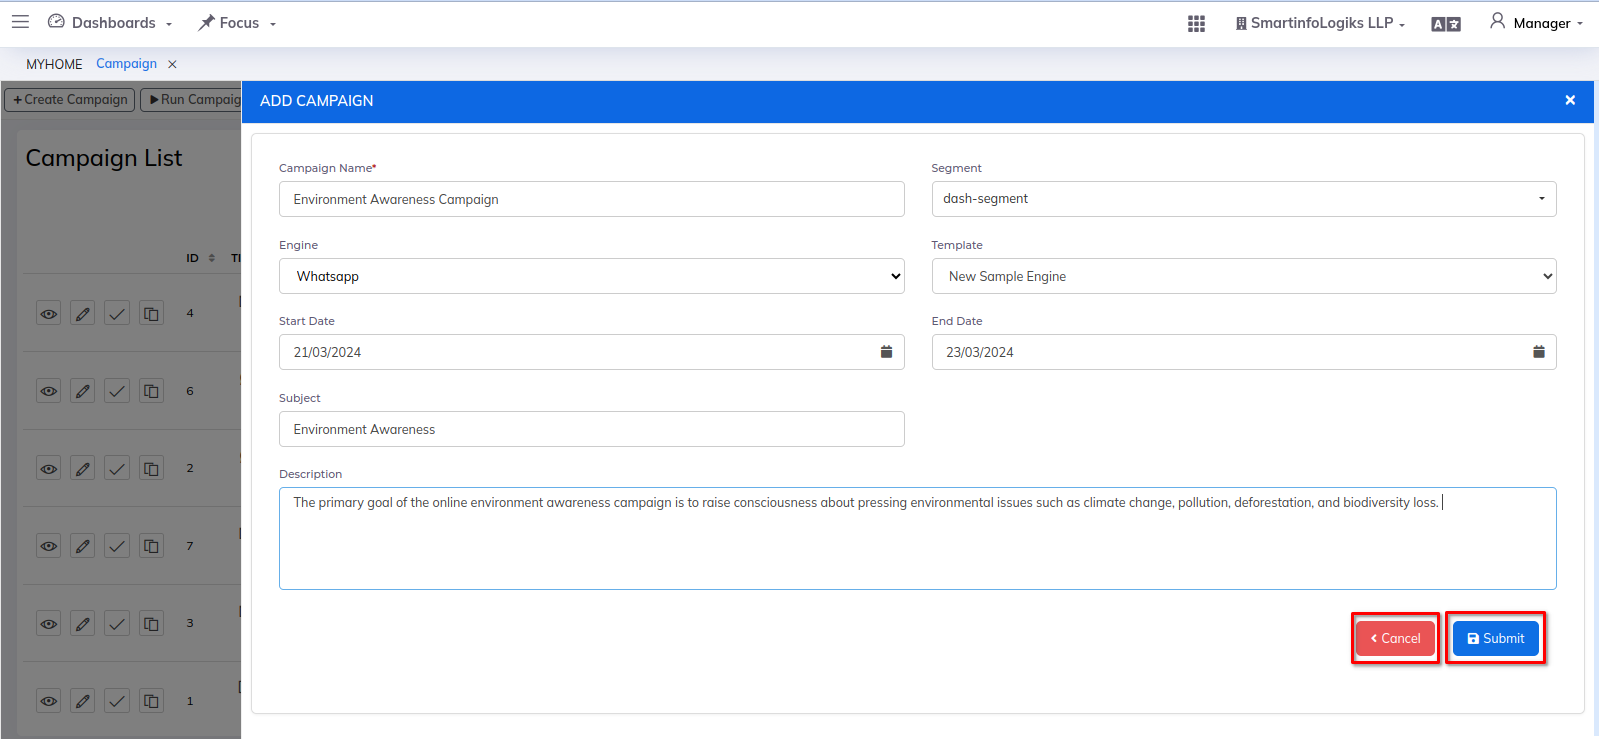
- Enter the details in the Add Campaign form such as:
Campaign Name : Enter the name of the campaign.
Segment : Enter the segment name.
Engine : Select the engine.
Template : Select the Template.
Start Date : Enter the start date of the campaign.
End Date : Enter the end date of the campaign.
Subject : Enter the subject name.
Description : Enter the description of the campaign.
Submit button : Submit button to save the created campaign.
Cancel button : Cancel button to close the form. - Click on "Run Campaign" button to run all the active campaigns.
- To view the added campaign, click on "View Campaign" icon.
- To edit the added campaign, click on "Edit Campaign" icon.
- To start the added campaign, click on "Start Campaign" icon.
- To clone the added campaign, click on "Clone Campaign" icon.
Audience Tab:-
Once you click on the Campaign module, you will see the Campaigns tab displaying the list of campaigns on your screen as follows :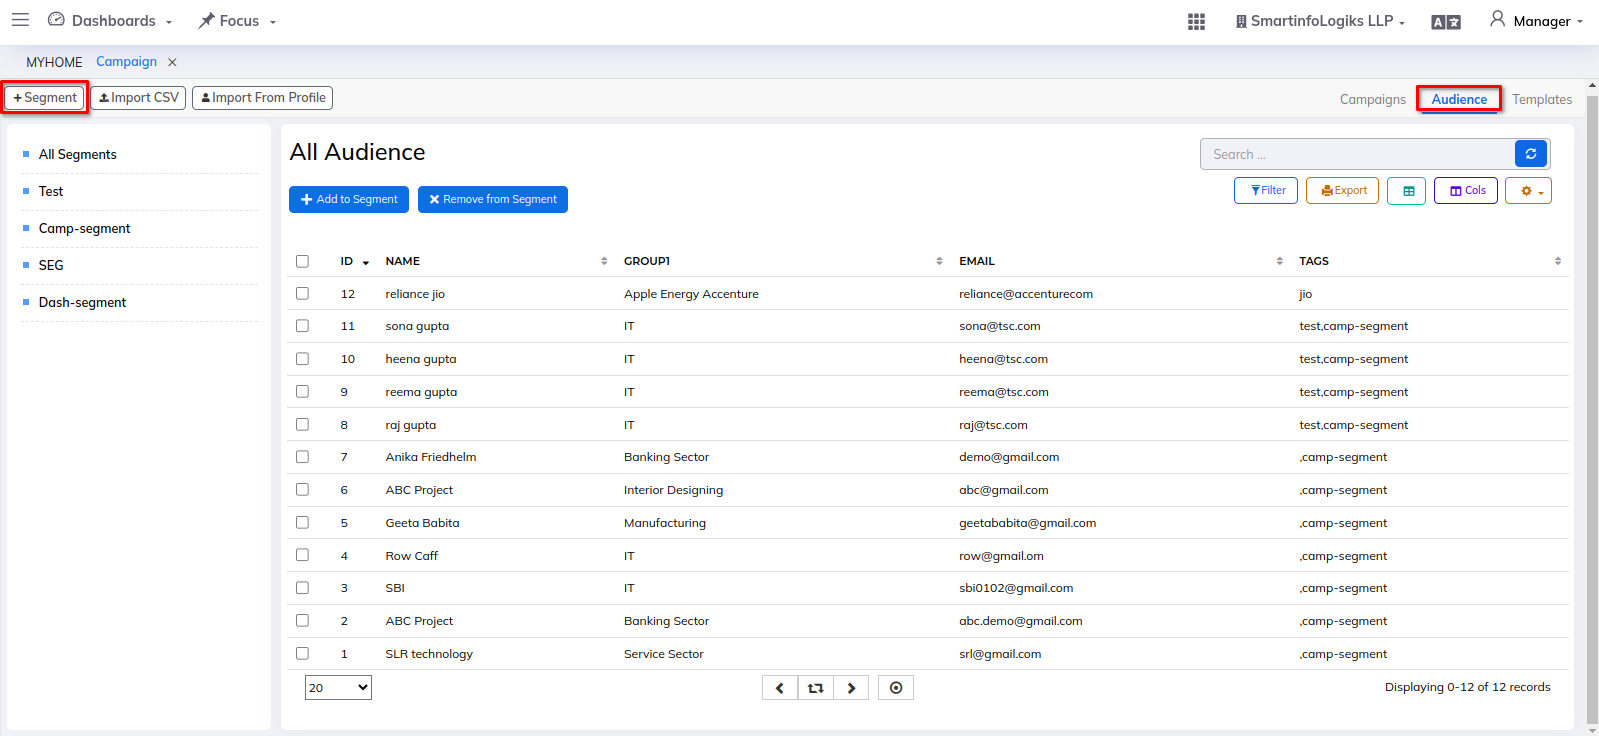
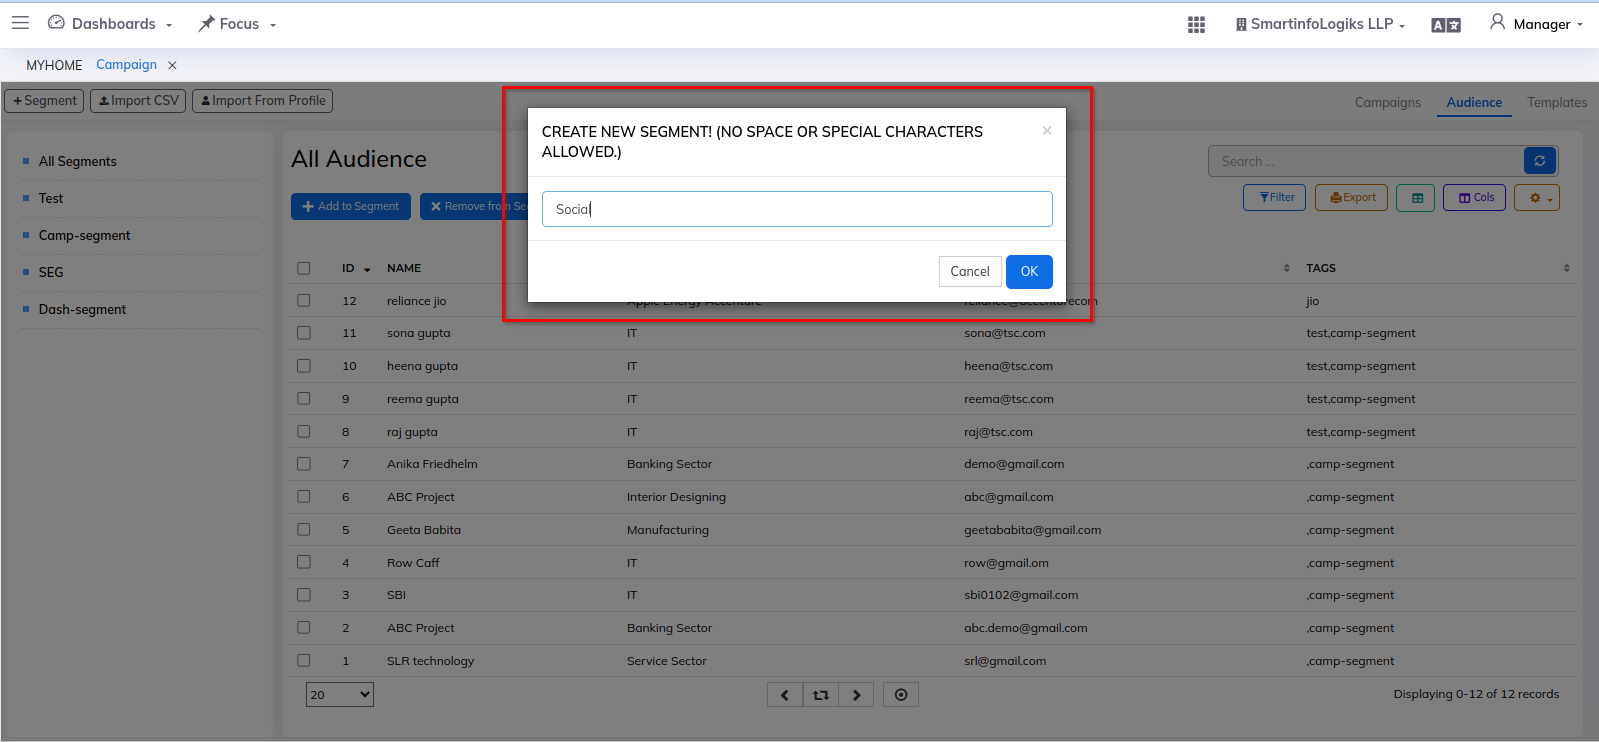
- To add new Segment, Click on "+ Segment " button.
- A Pop up to add new segment will be shown as follows :
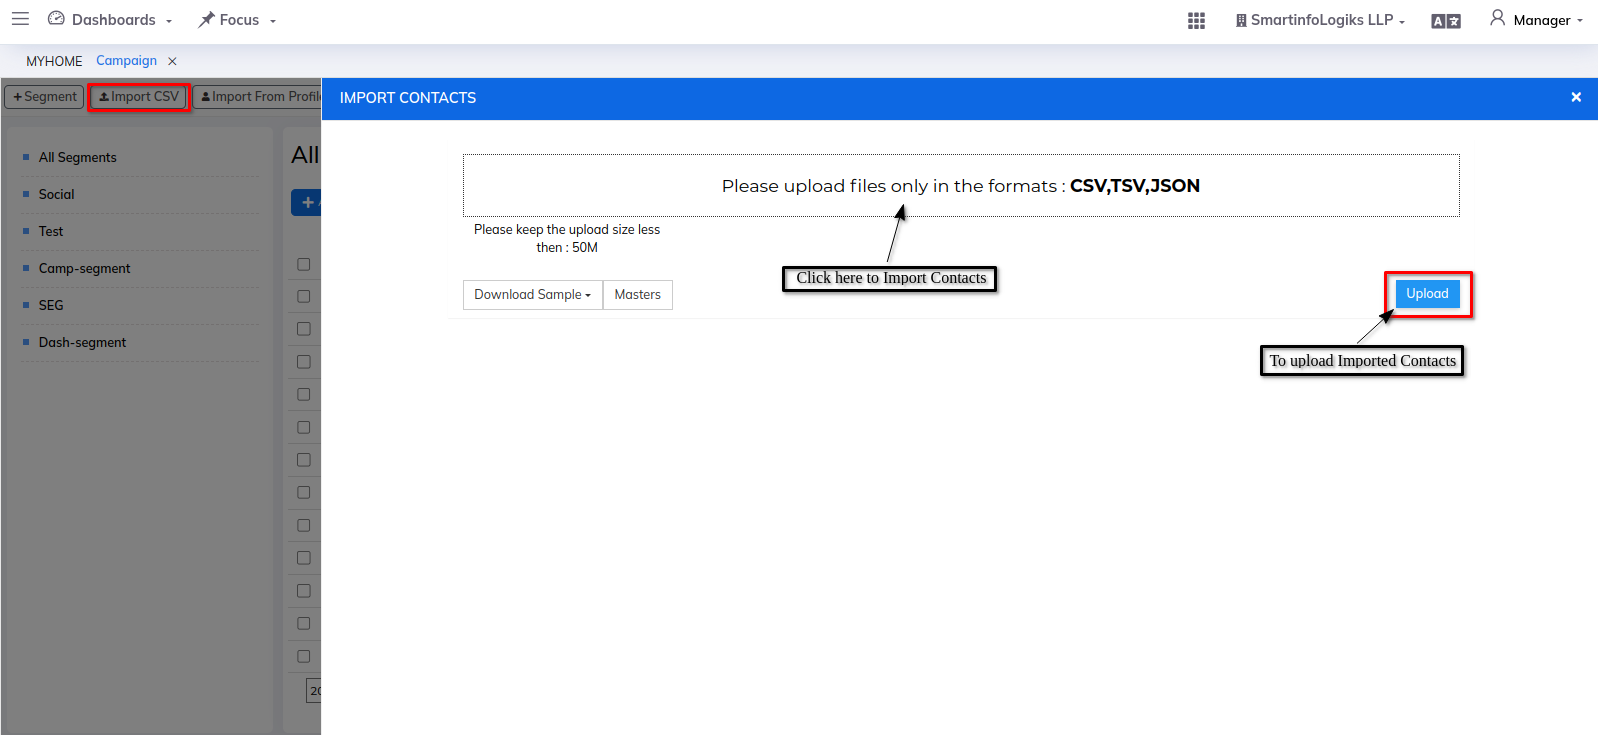
- Click on "Import CSV" button to Import bulk contacts in Segments.
- A Pop up to Import Contacts will be Shown on your screen as follows:
- Click on "Import From Profile" button to import contacts from profile.
- A Pop up showing the contacts list will be shown on your screen.
- Select the contacts you want to add and click on "Add In Audience" button to add the contacts.
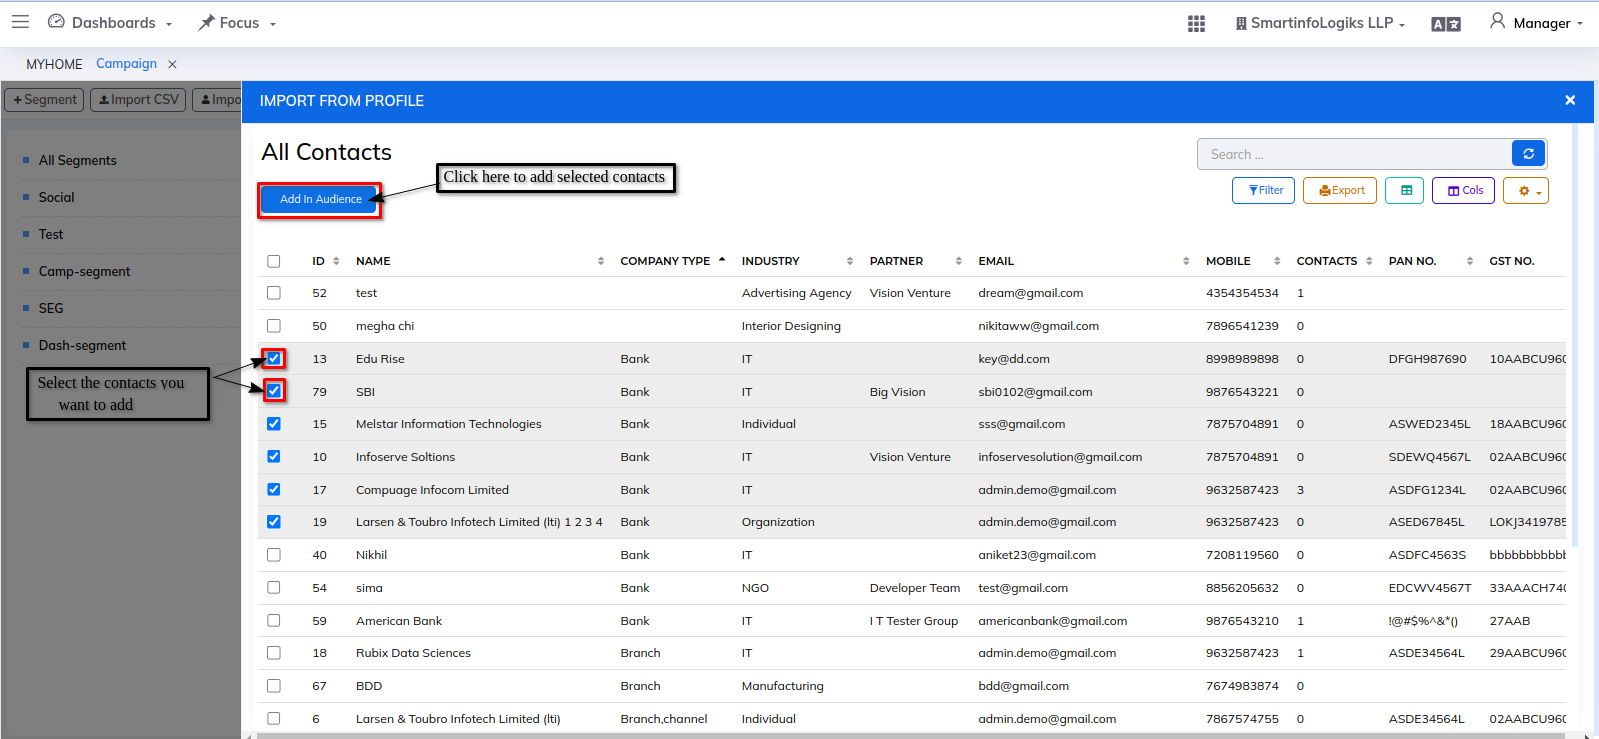
- Added contacts will be displayed in the Audience List.
- Select the contacts from the audience list you want to add to the segment / Remove from the segment.
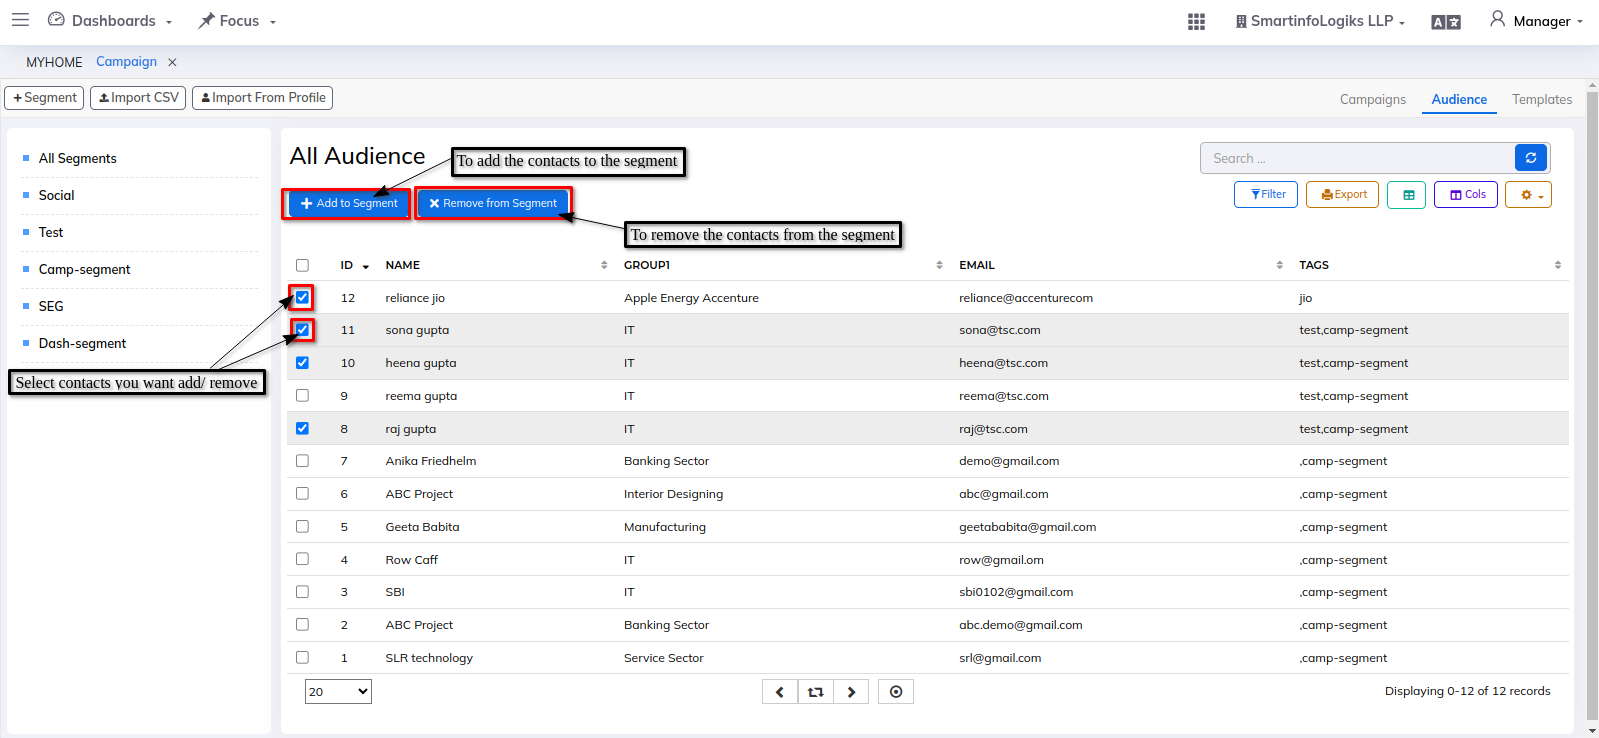
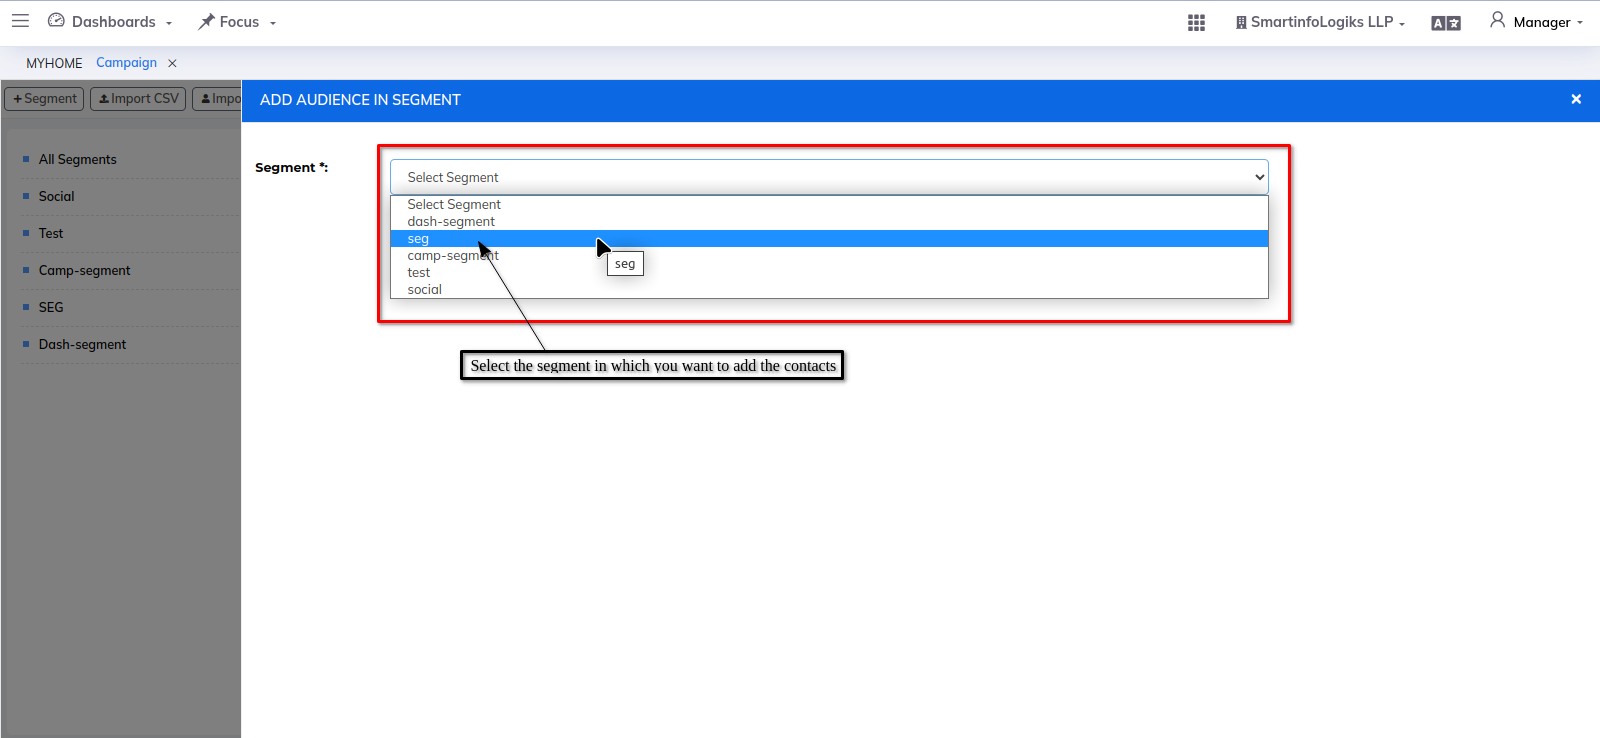
To Add Contacts to the Segment: - Once you Click on "Add to Segment" button, A segment List drop down will be popped up on your screen.
- Select the Segment in which you want to add your contacts, then click on "Submit" button.
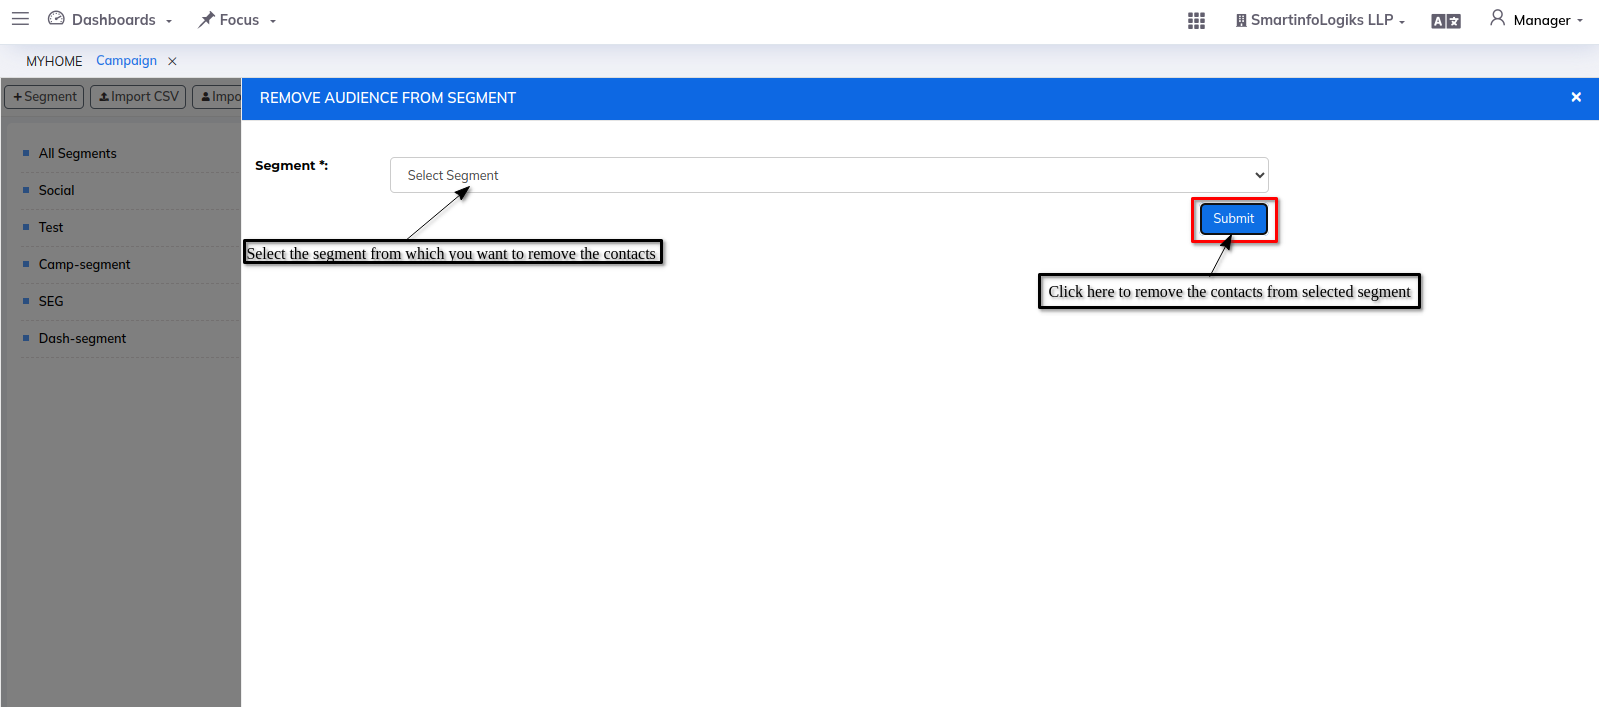
To Remove Contacts from the Segment: - Similarly, if you want to remove contacts from Segment, select the contacts and Click on "Remove From Segment" button.
- Select the Segment from the drop down from which you want to remove the contacts, then click on "Submit" button.
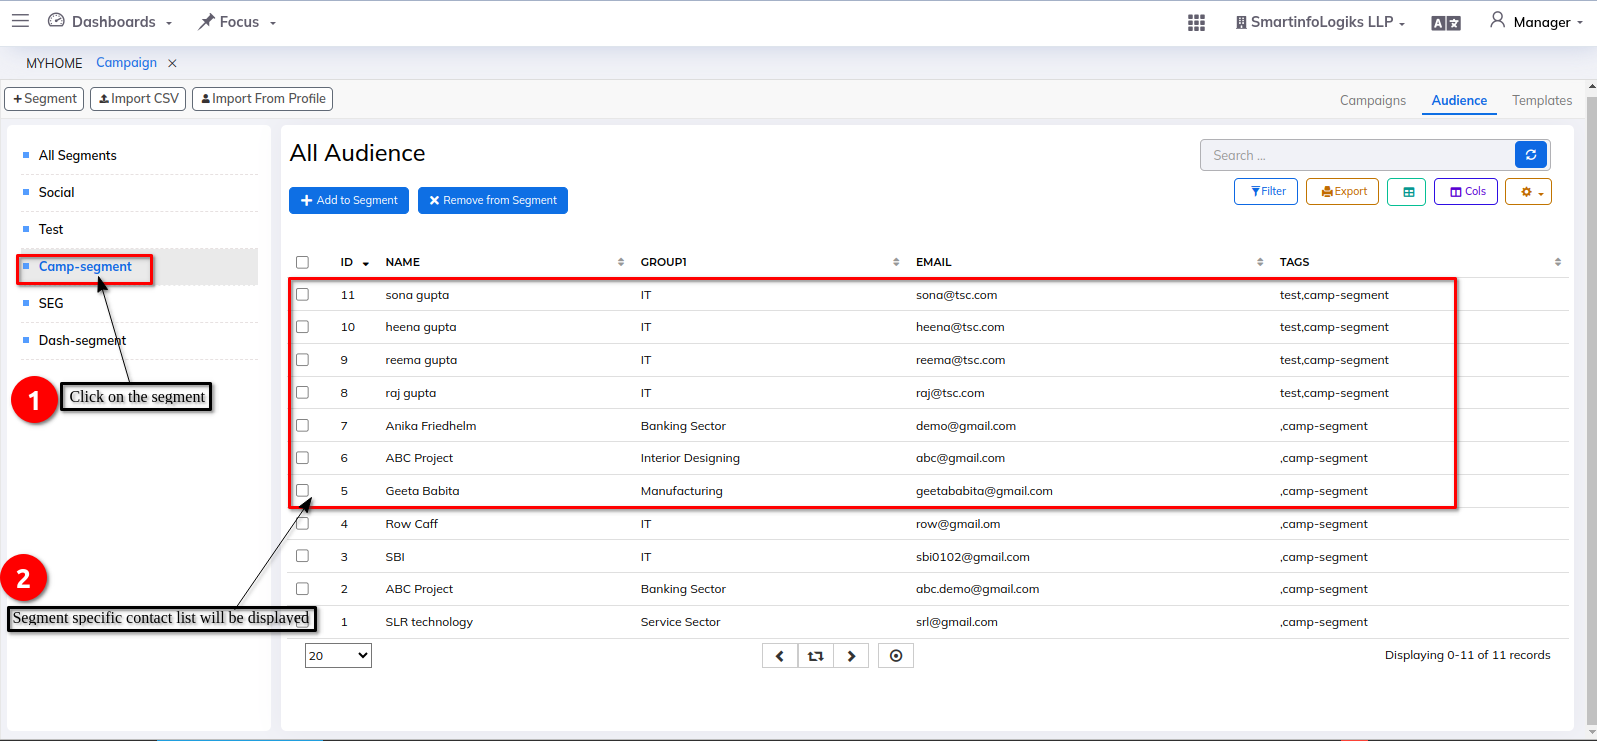
- If you want to view the contacts of a specific segment, simply click on the segment name and the corresponding contact list will appear:
Templates Tab:-
Within the Templates tab, it is possible to generate fresh templates for Engines.
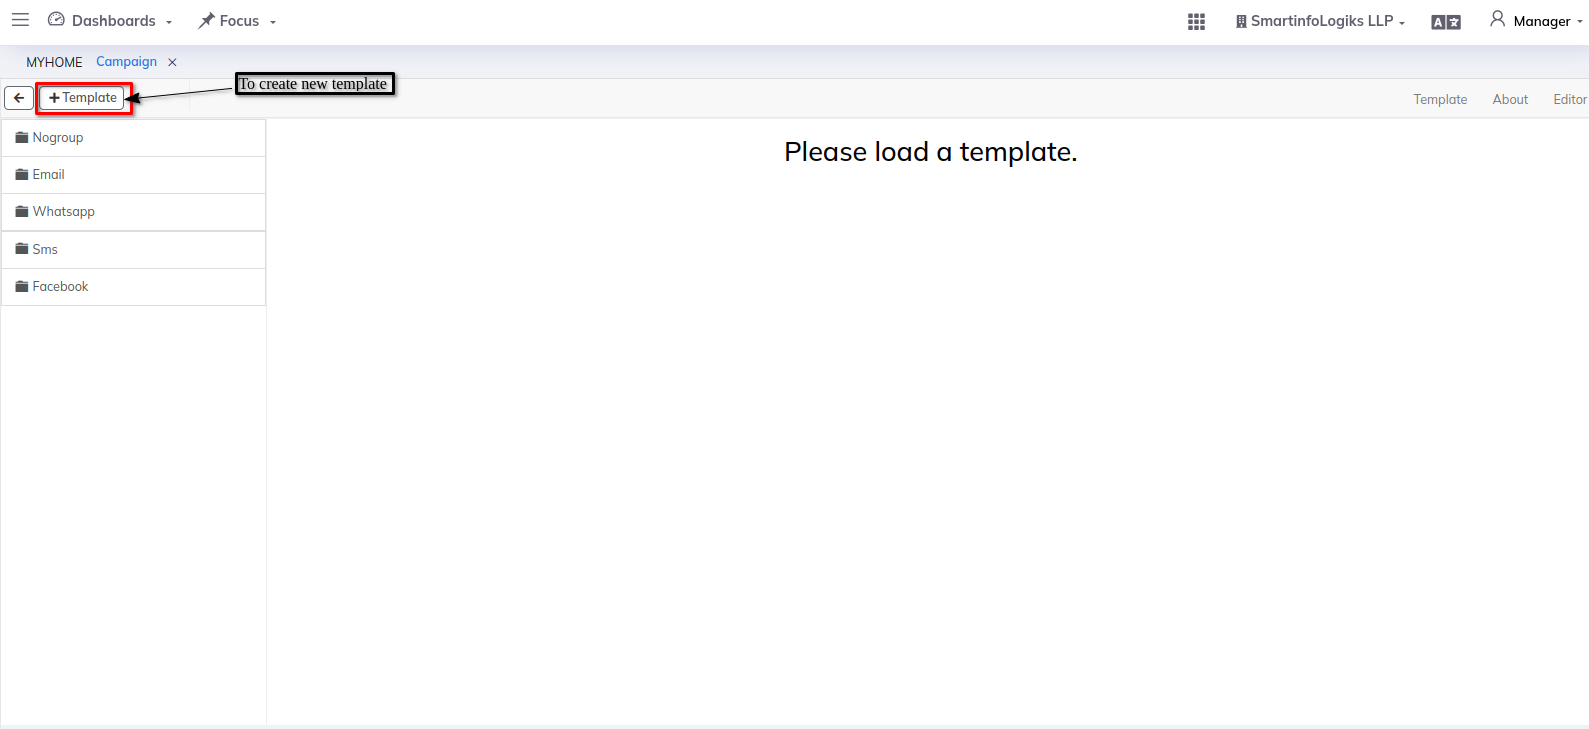
To Create New Template : Click on "+ Template" button.
Then a pop up for creating New Template will be displayed.
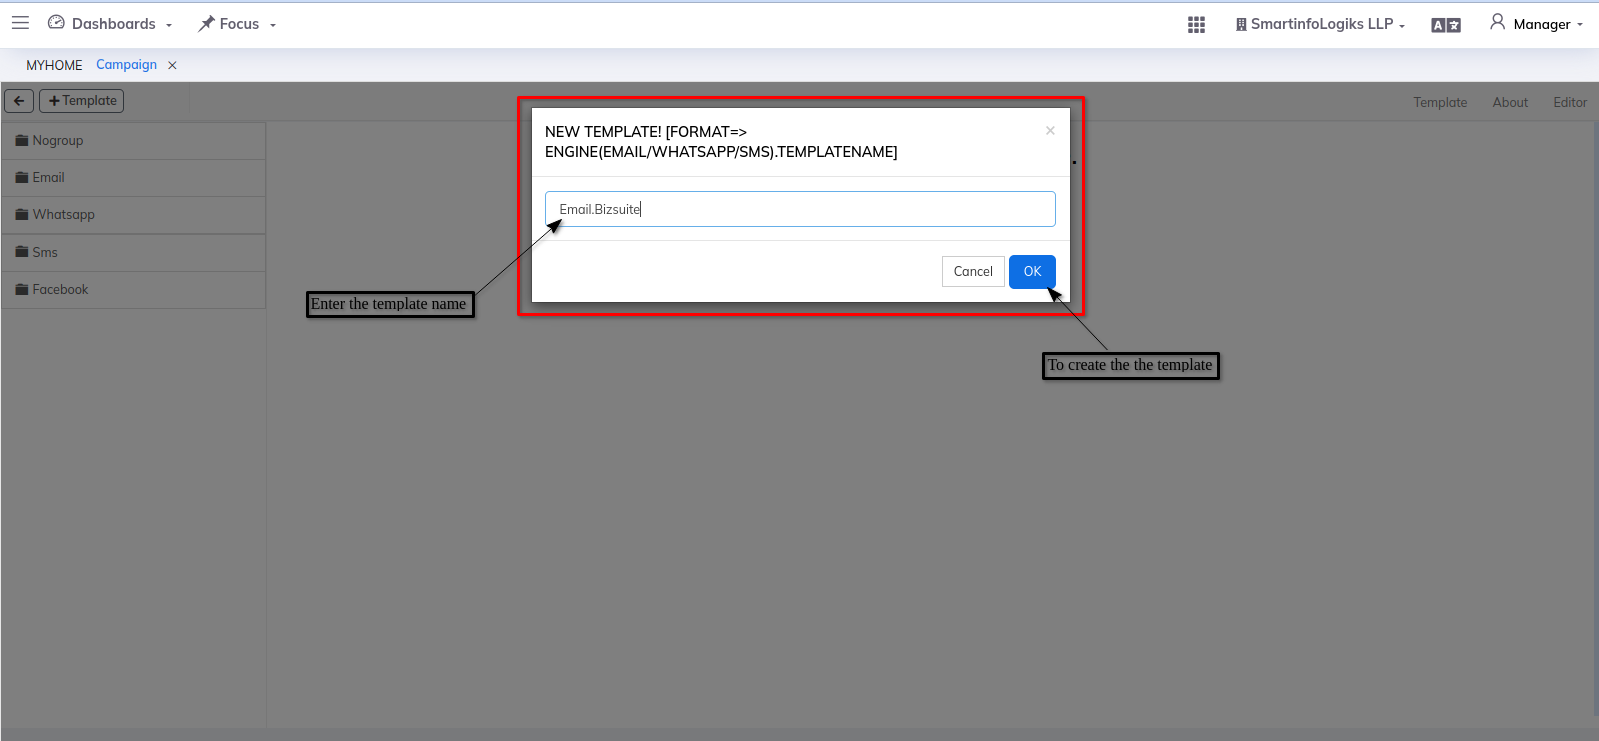
- Make sure to follow the proper format for adding a new template. The correct format is "Engine Name.Template Name".
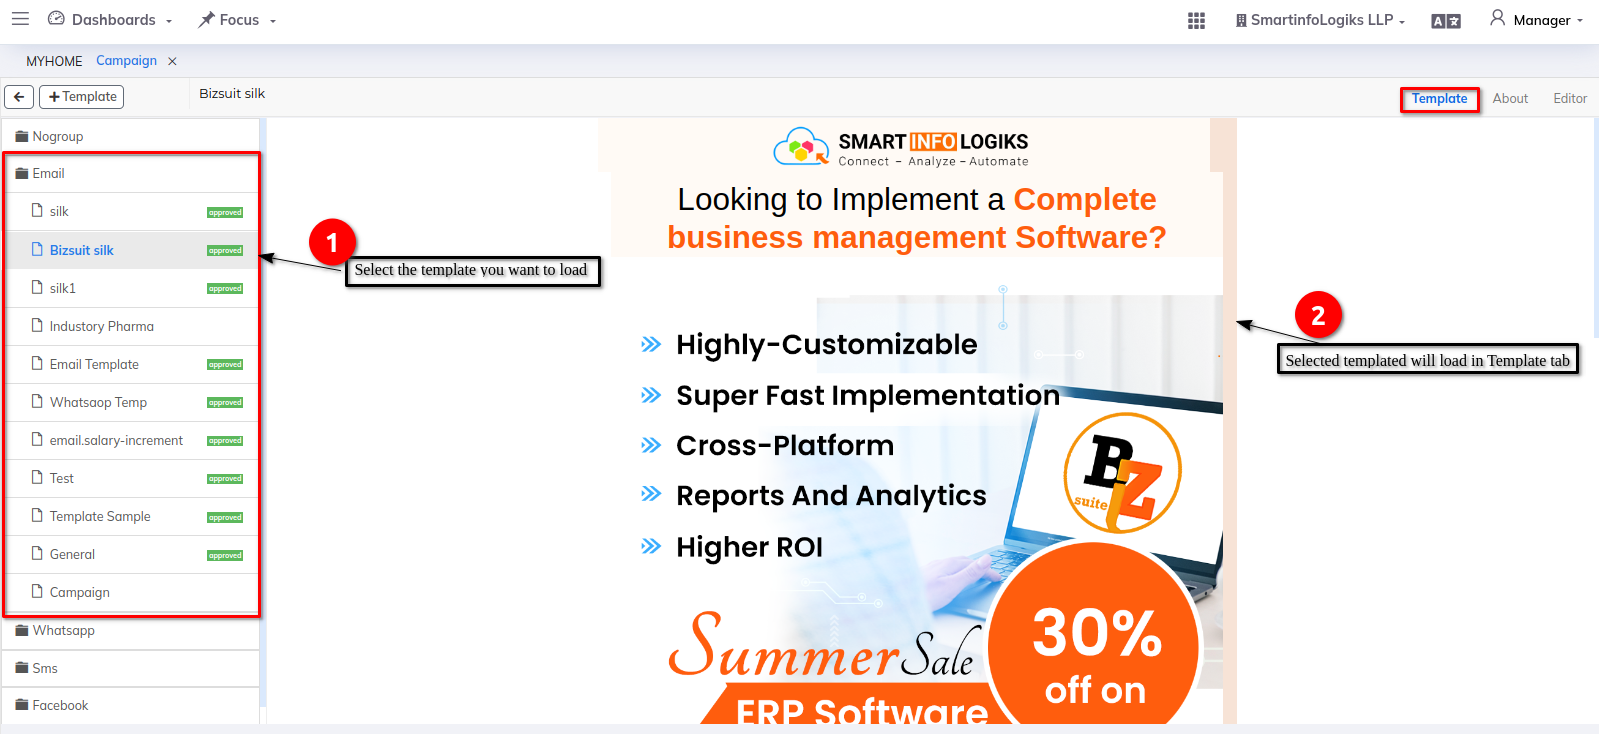
- The template can be accessed by clicking on it in the respective engine folder.
- The template that you have selected will be loaded in the template tab.
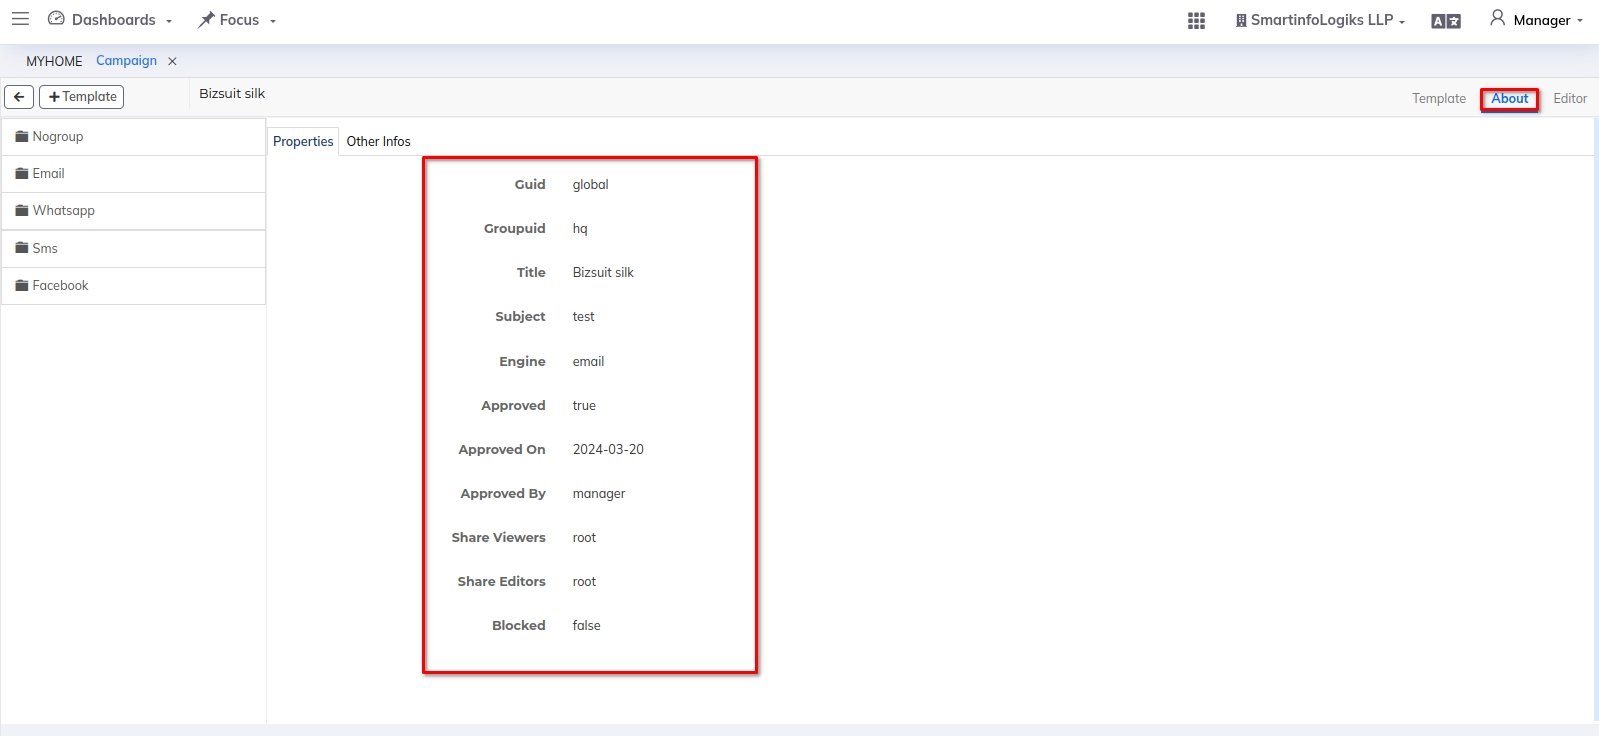
In the About tab, you can view the properties and other information related to the selected template.
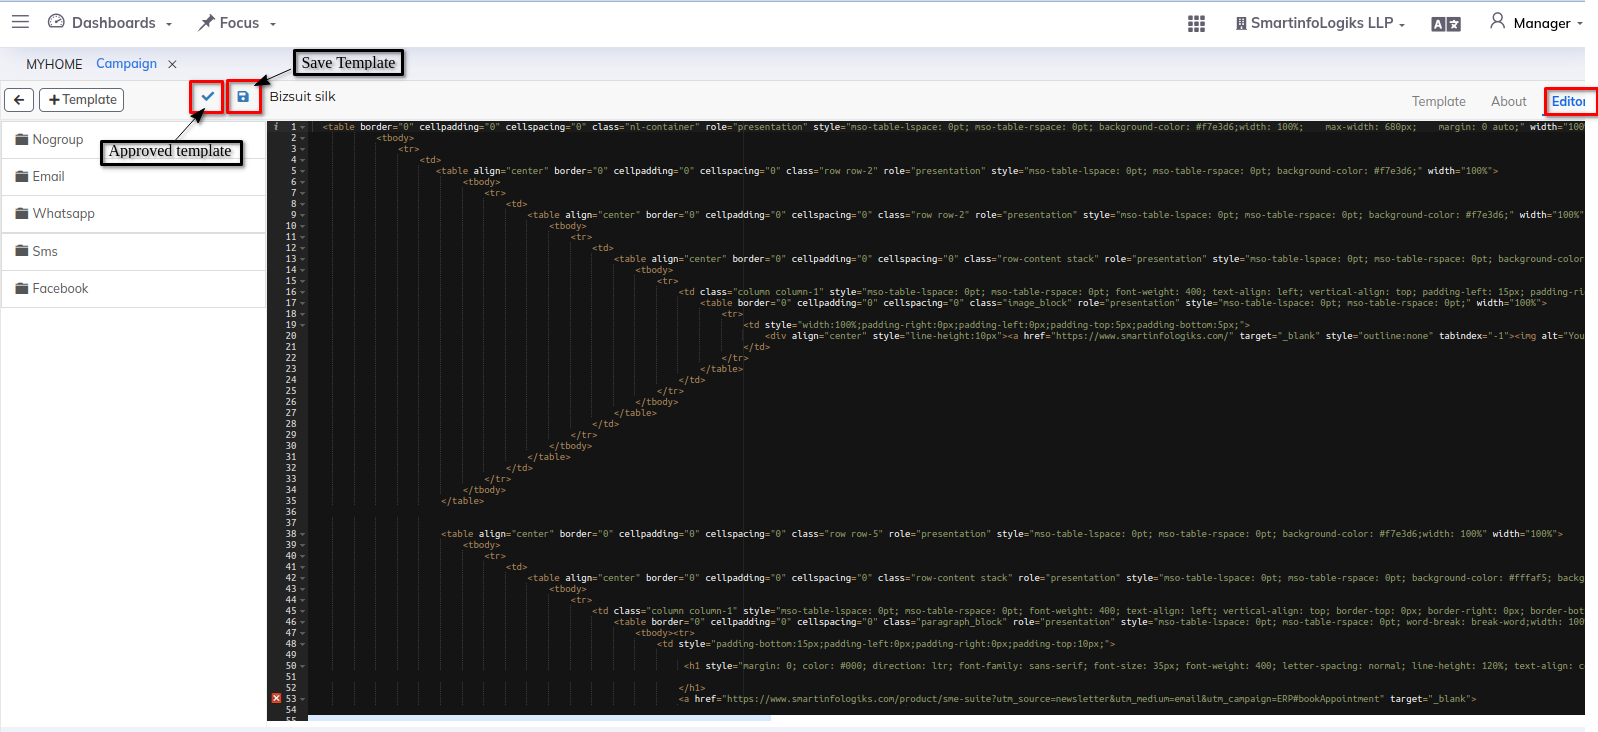
Transform the template of your choosing with ease by accessing the editor tab.
