Project
In project setup, all of your views for reporting and analysis are created and managed. As a result, you may construct intelligent reports and dashboards using your data, as well as logically organise your datasets (stored in entities called Tables).
It is only possible for the Administrator to create or update Project. They are able to carry out every action that can be carried out, including managing users, generating projects, dashboards, reporting, and sharing information.
Creating a Project
Analytics101 offers various easy options to create a Project in your account. The Projects you create are listed at the top of the screen.
How can I create a Project?
You can create a Project from the Analytics101 Settings page. To create a project:
- Login to your Analytics101 account.
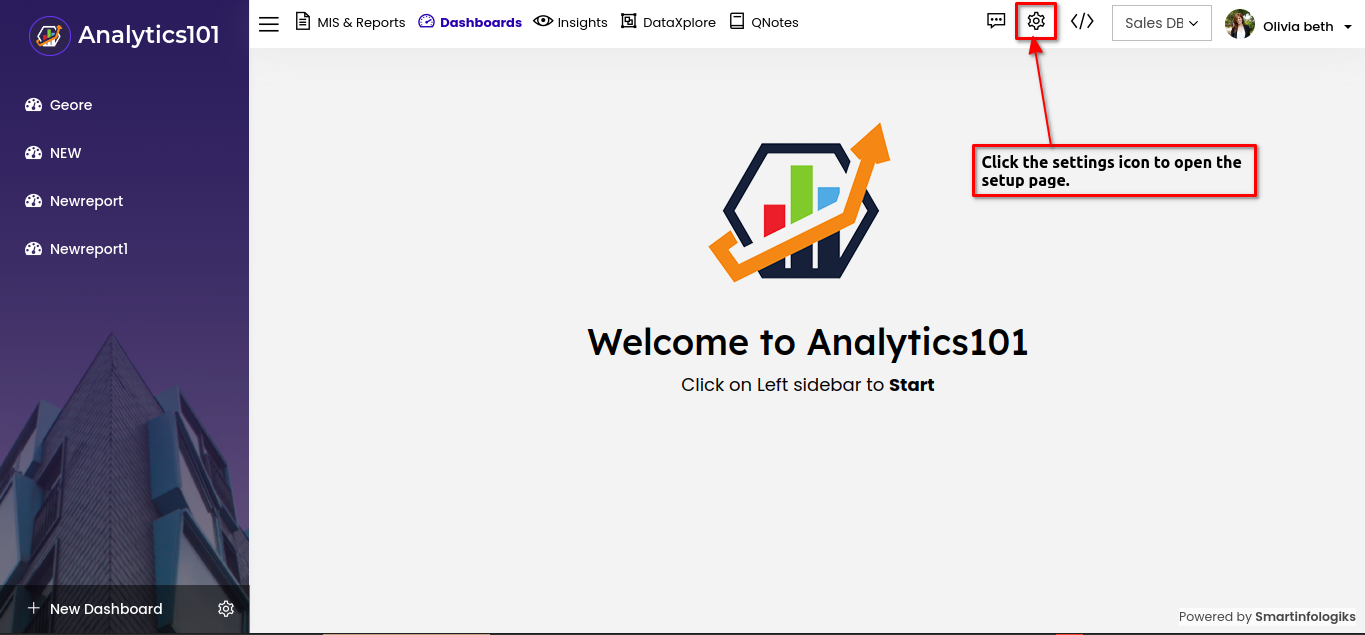
- In your Analytics101 Home page, click on the Settings button as shown in below.
- After the Settings button click, the page below opens shown below.
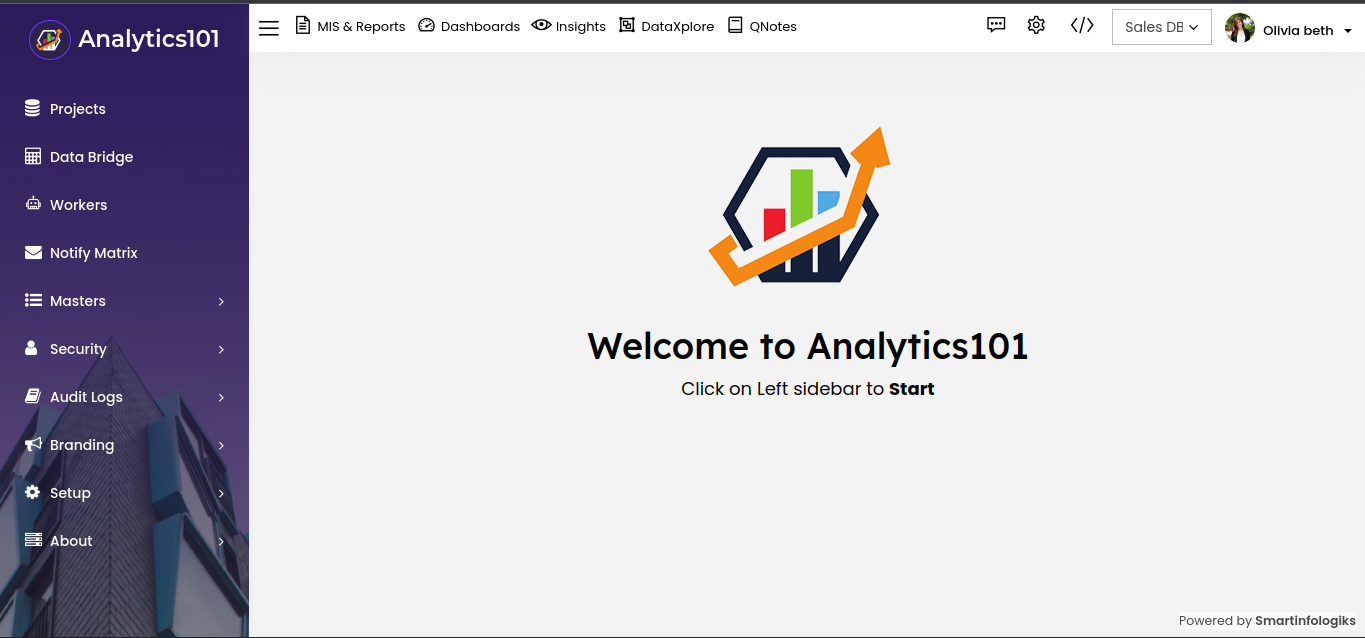
- To start a project, select the Projects menu.
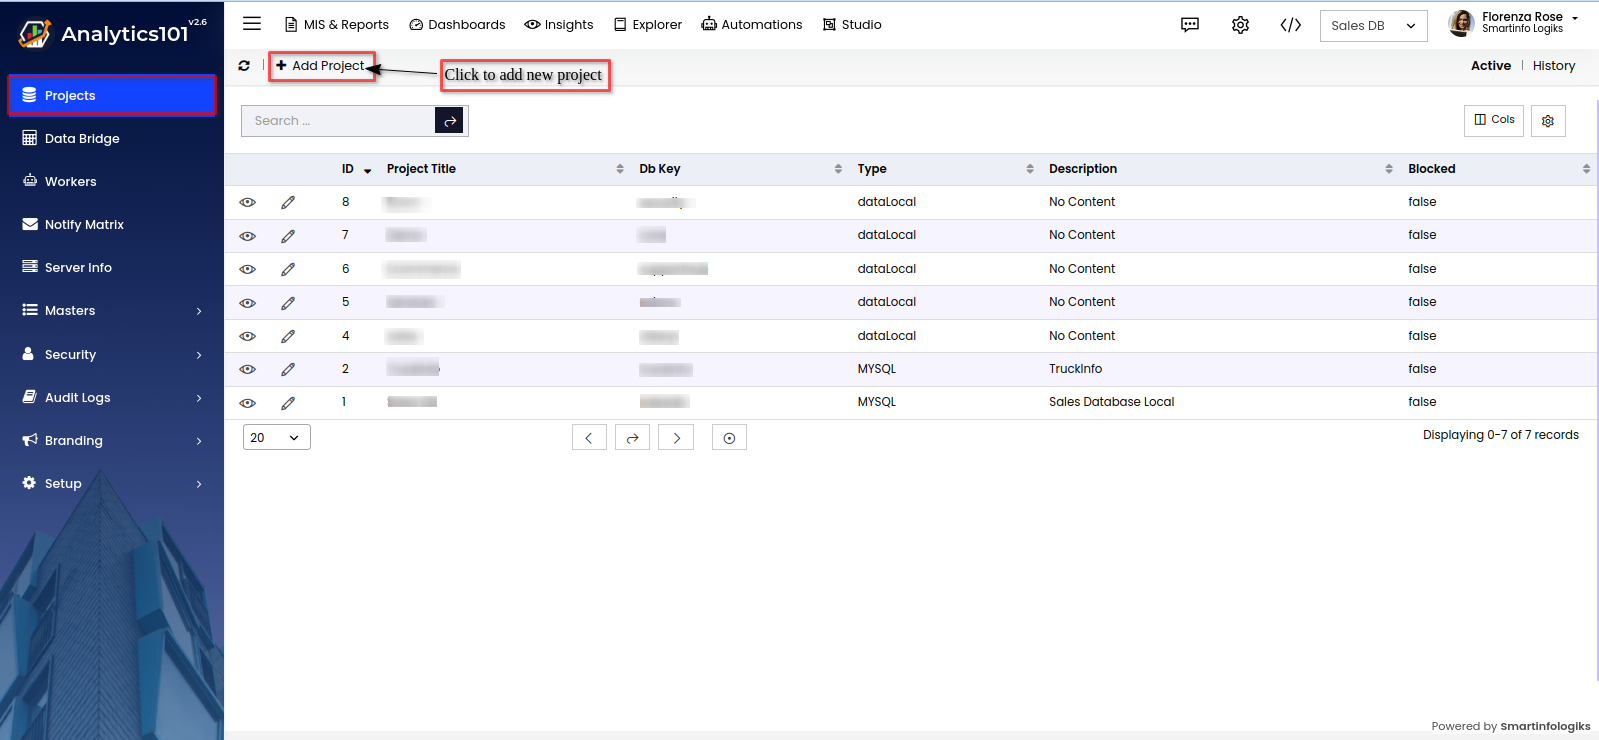
- The "+Add project" button can be used to start a new project.
Project Information:
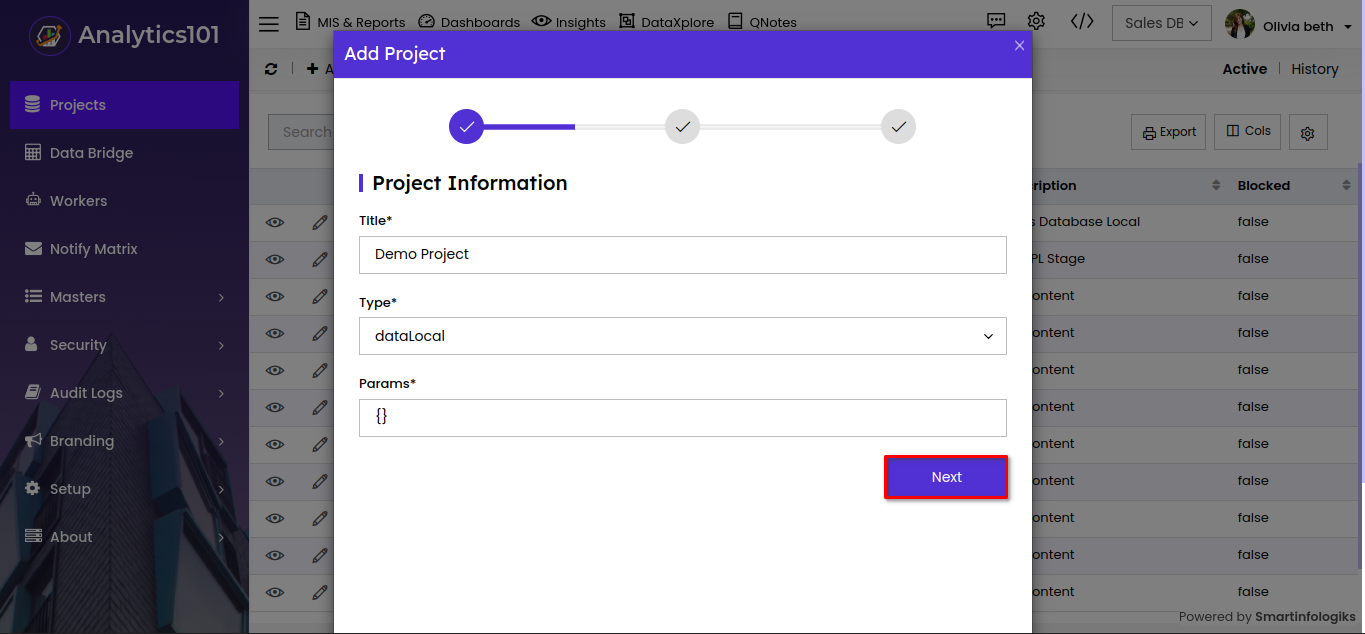
Title : Enter the name or title of the project that you want to set up.
Type: Choose either datalocal for managing local data in an analytics project, handling data stored on-premises, or, Opt for databridge that acts as a vital link between various data sources.
Params: Enter the Params. - Click the Next button once the project information has been filled out.
After selecting the databridge type, the following window appears shown below. (Note: If you select datalocal, you will skip the middle step and go directly to the final step.)
Data Bridge:
Data Bridge - Pick or add a data bridge, the databridge master is reflected in the databridge options.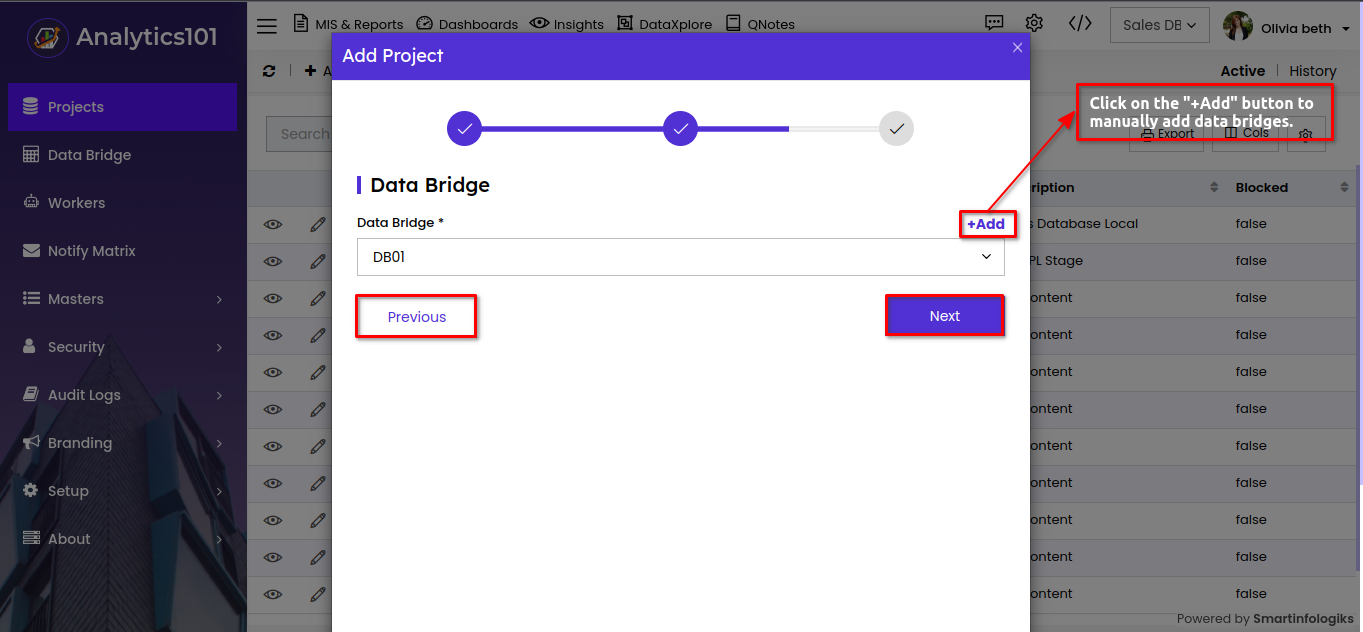
- Click the Next button once the data bridge information has been filled out.
DB Key - There are two conditions: either when you pick databridge, database key selections are created based on the selected option of the databridge master, or when you select datalocal, database key options are generated.
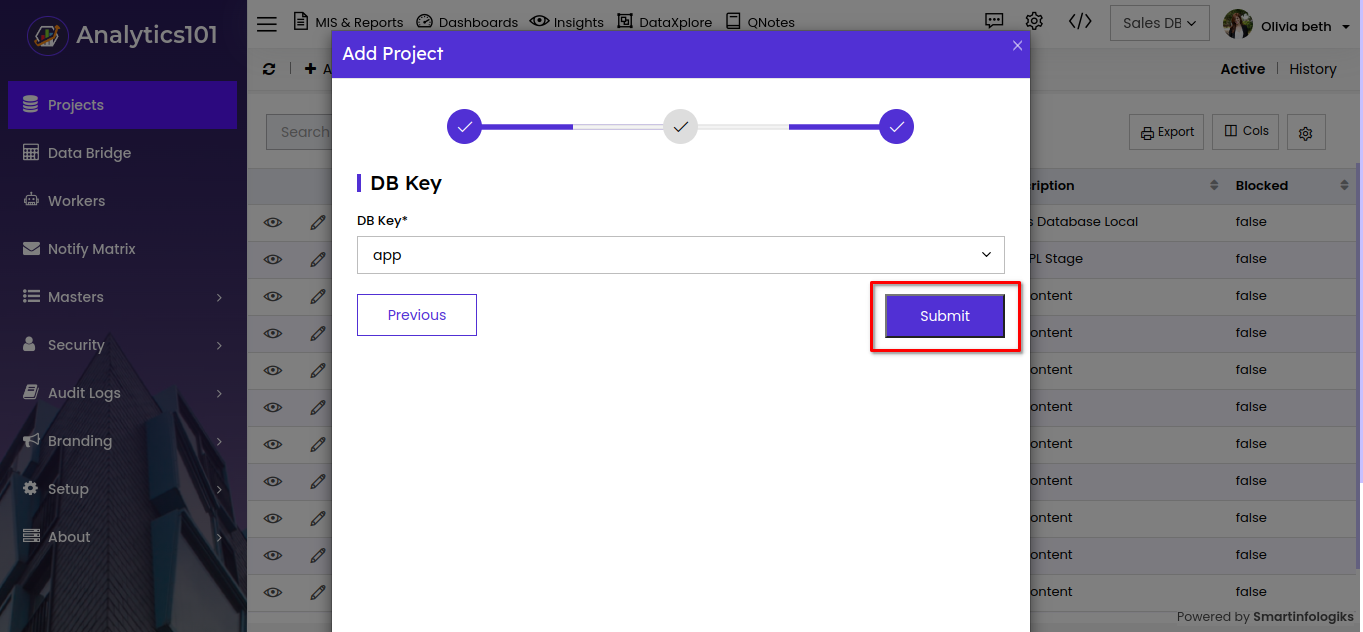
Once all the fields have been filled out, click the Submit button to submit data to the project report.
(Note : A unique DB key is required.)
Once a project has been submitted, it will appear in the report where you may view, edit, and update its details.
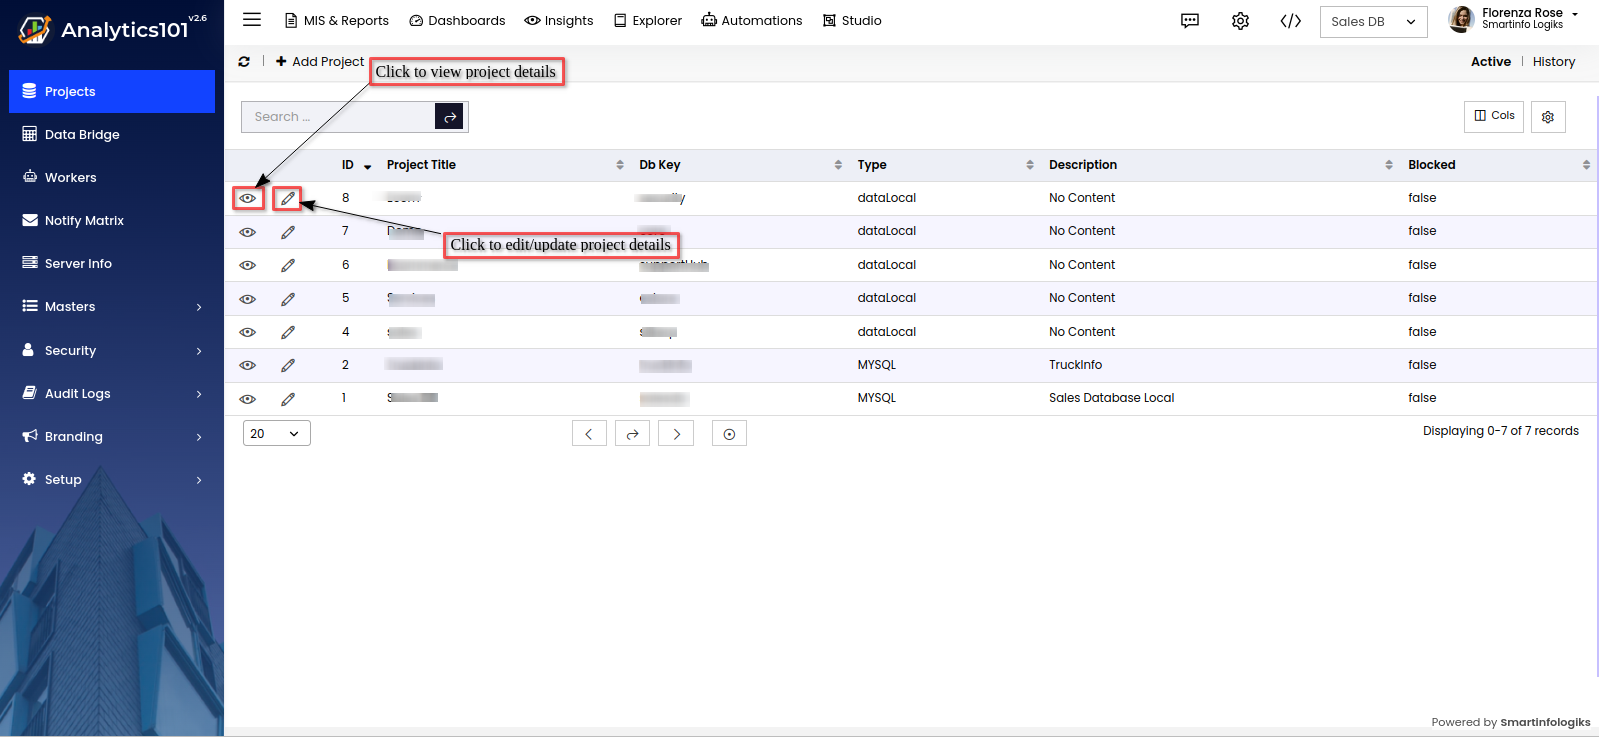
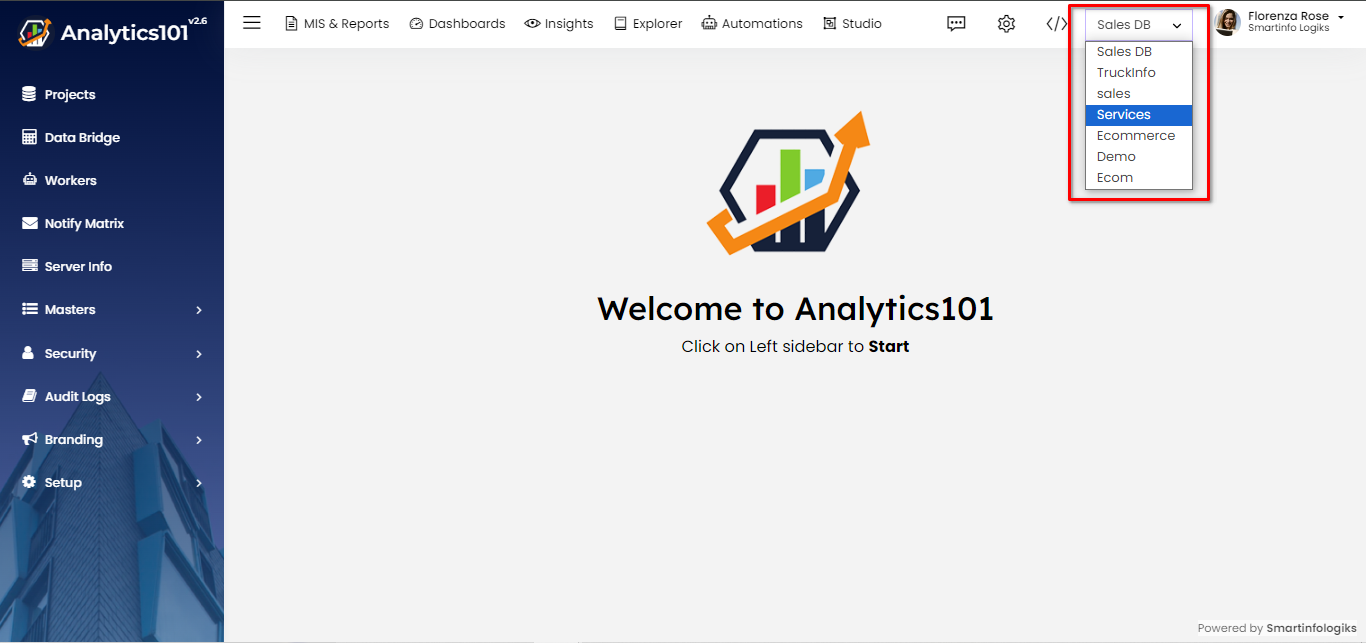
When a project is created, it appears on the right-hand side on the top bar, as seen in the image below.
