After acceptance, the lead's information is used to create an official sales order. This order is entered into the organization's systems, triggering various actions. Steps:
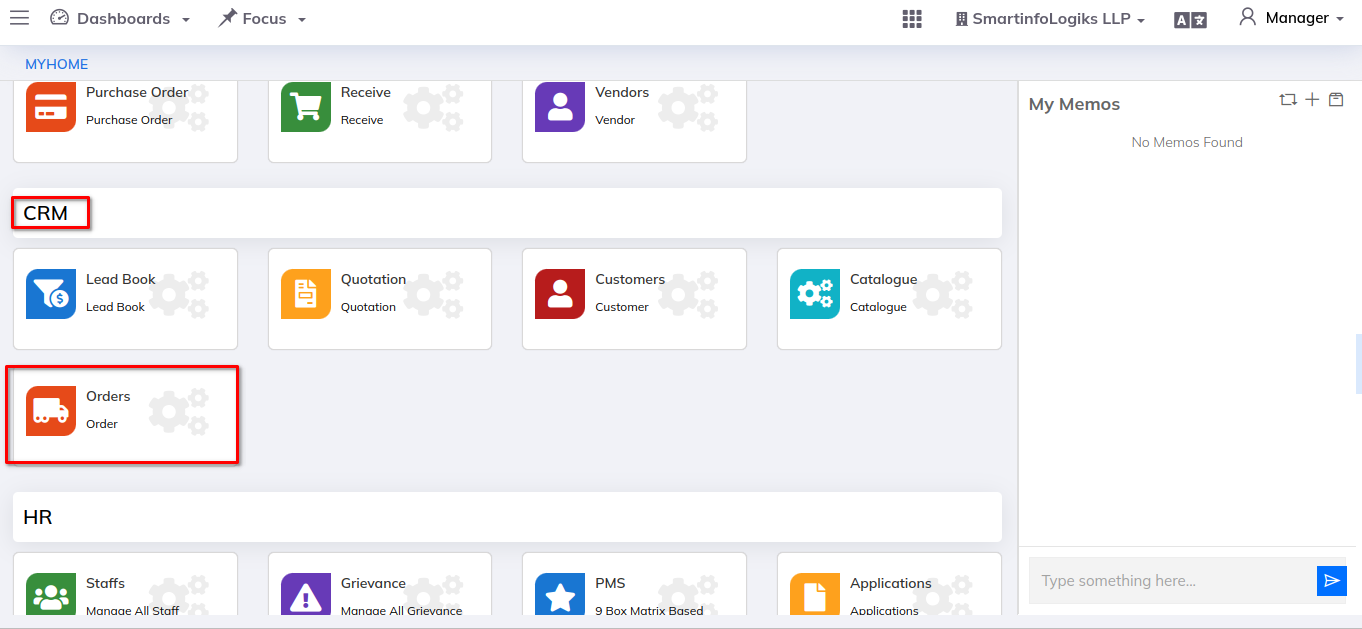
Goto the CRM.
Then Go to the Orders Module.
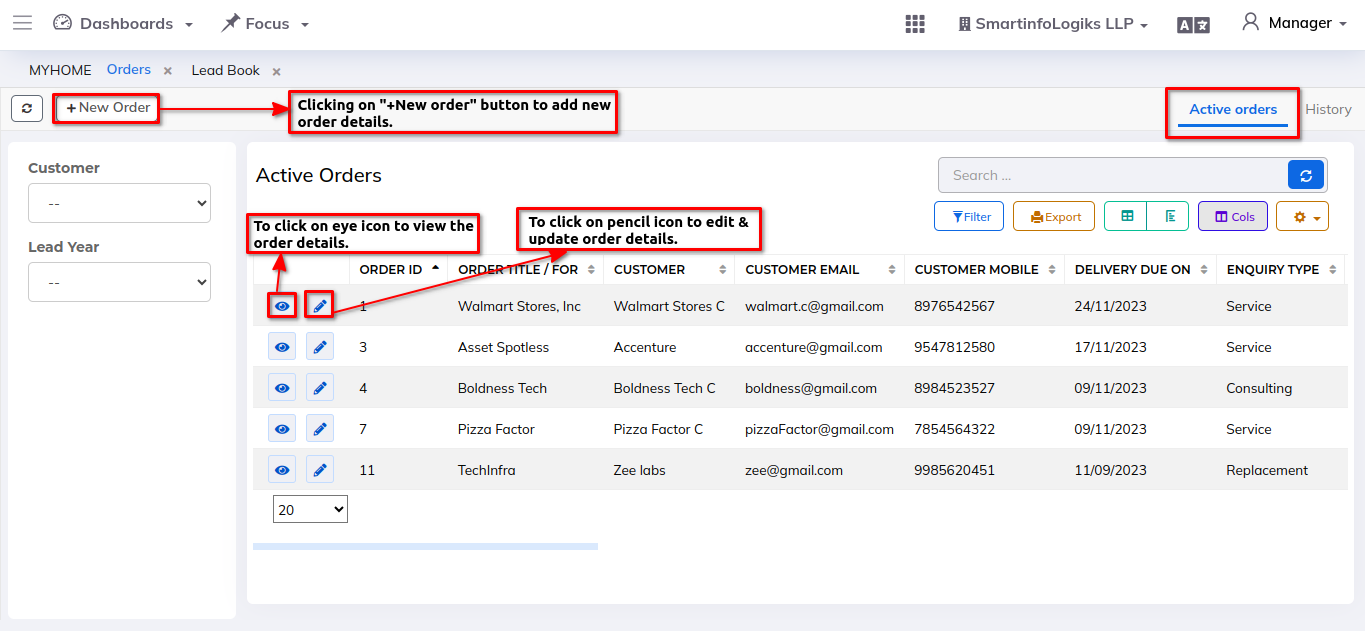
After clicking on Orders module, user will be redirect to the Active orders tab as shown in below image.
1. Active Orders:
Active orders report is manage their order processing and fulfillment operations.
Based on the sidebar we can easily get filter the record as per Customer and Lead year.
Orders are generated through leads or through creating direct orders.
For creating direct order please follow the below step:
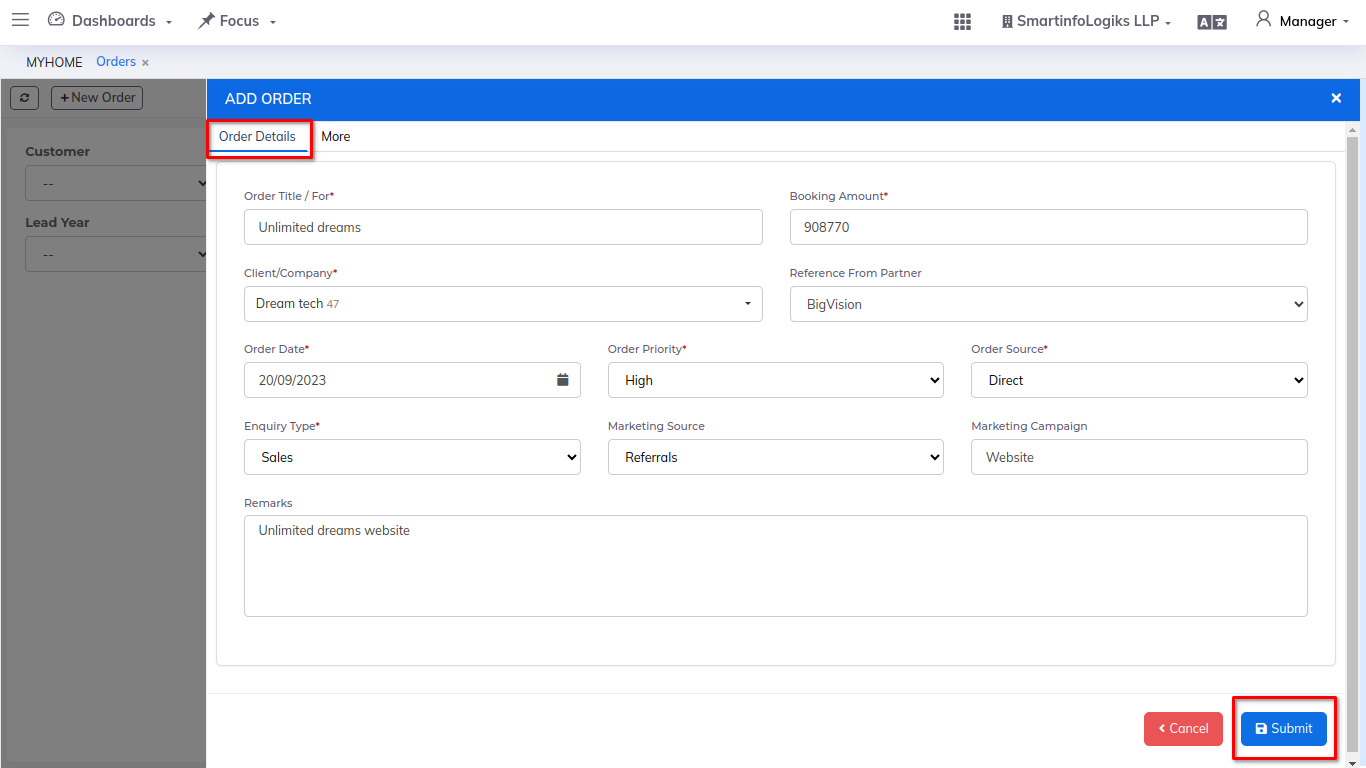
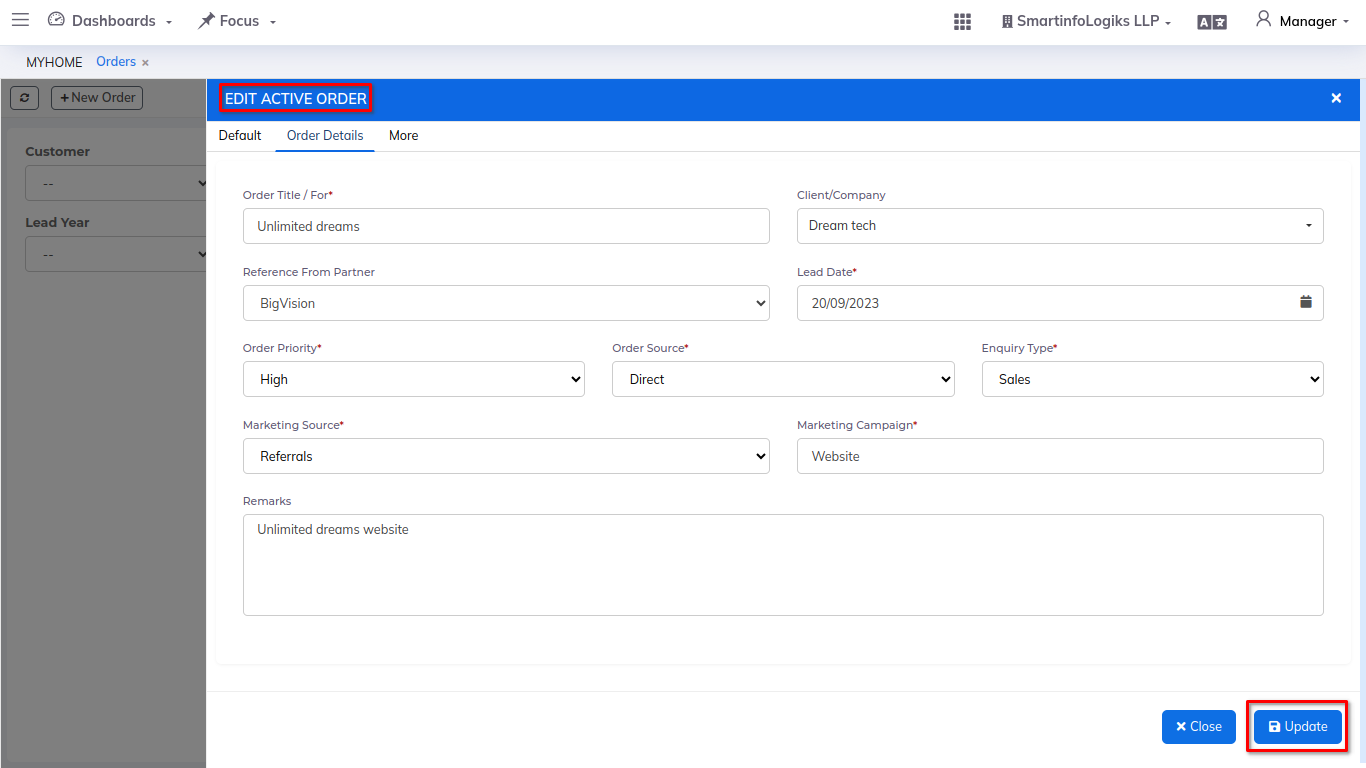
Step : Click on the +New Order button, order creation form will get open as shown in the below image.
Enter the required details.
Order Title / For: Enter the Order name .
Booking Amount: Enter the booking amount, which is decided by management or a lead time.
Client Company: Select Client Company using dropdown.
Order Date: Specify the order date of the order.
Order Priority: Enter the Order Priority using dropdown.
Order Source: Select Order Source using dropdown.
Enquiry Type: Select order enquiry type using dropdown.
After filling all the required fields click on the Submit button. On click of submit, record will be added successfully.
Also we can provide non-mandatory/additional option while creating new order.
Reference From Partner: Select Reference From Partner name using dropdown.
Marketing Source: Select Marketing source using dropdown.
Marketing Campaign: Enter the Marketing campaign.
Remarks: Enter the Remarks.
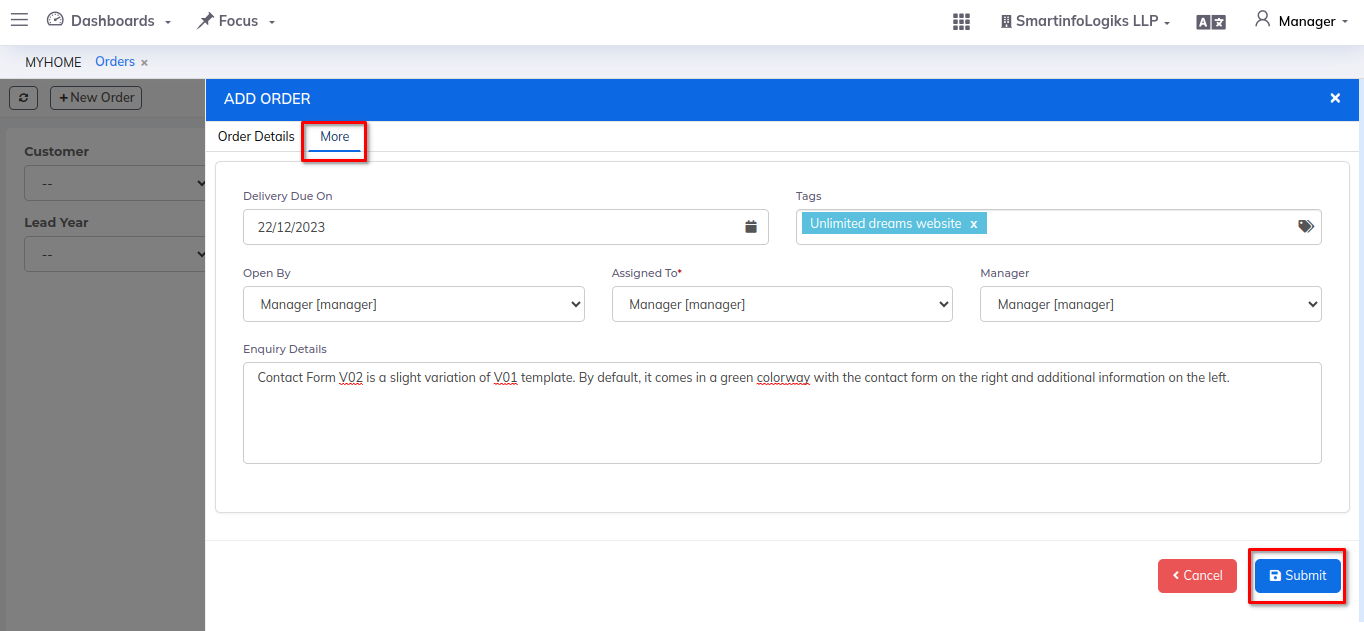
After entering all the order details in the 'order details' tab, click on the More tab.
Delivery Due On: Specify the delivery due date of the order.
Tags: Enter the tags.
Open By: The user can choose "open by" from a dropdown list, as well as by default displayed login user session id.
Assigned To: The user can choose "Assigned by" from a dropdown menu, as well as by default displayed login user session id.
Manager: The user can choose "Manager" from a dropdown menu, as well as by default displayed login user session id.
Enquiry Details: Enter the order enquiry details.
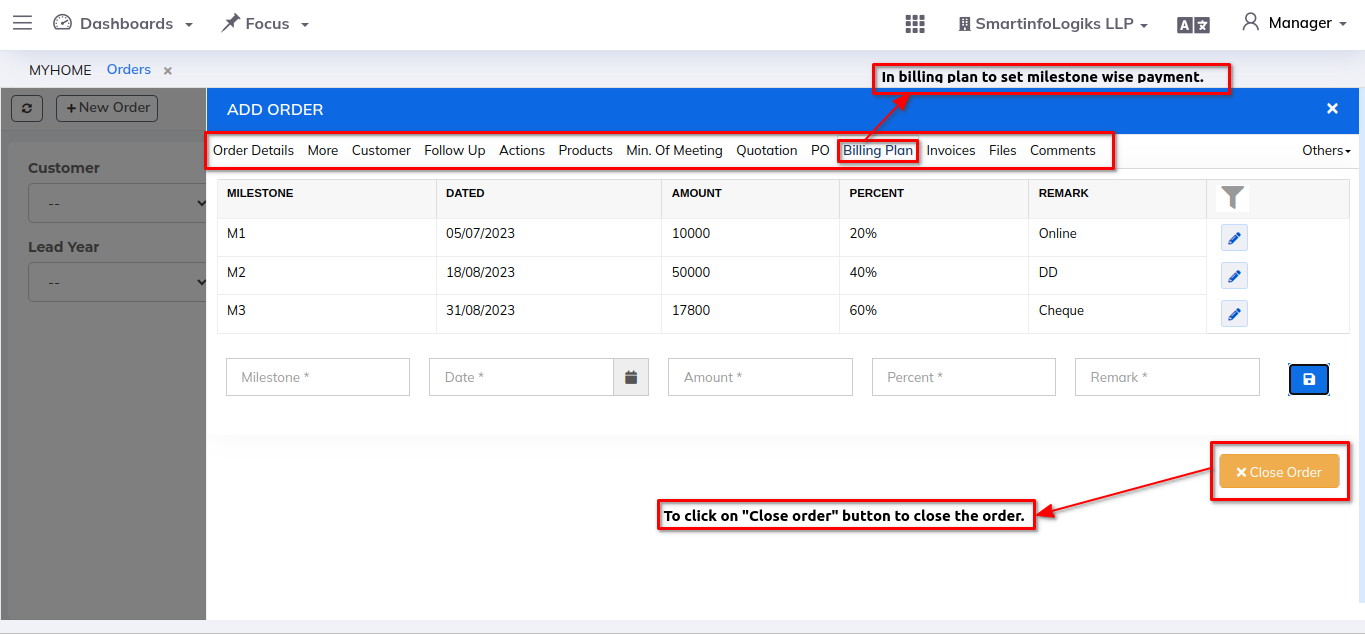
To view the order details click on the eye icon.
Clicking the "Close order" button in infoview closes the order and moves the record to the history tab.
To edit/update the order details click on the pencil icon.
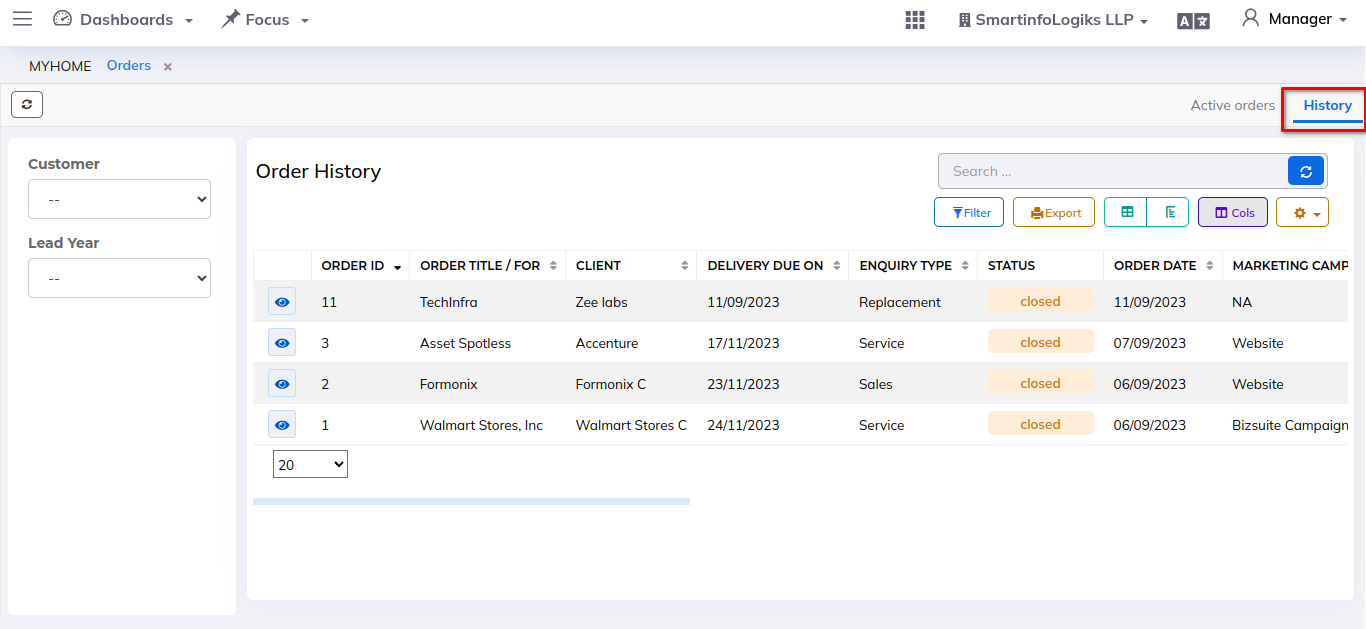
2. History:
To a comprehensive record or log of all the orders that a customer or client has placed with a business or organization over a specified period of time.
This record includes details of each individual order, such as order dates, items purchased, quantities, prices, payment information, and order status.
Based on the sidebar we can easily get filter the record as per Customer and Lead year.