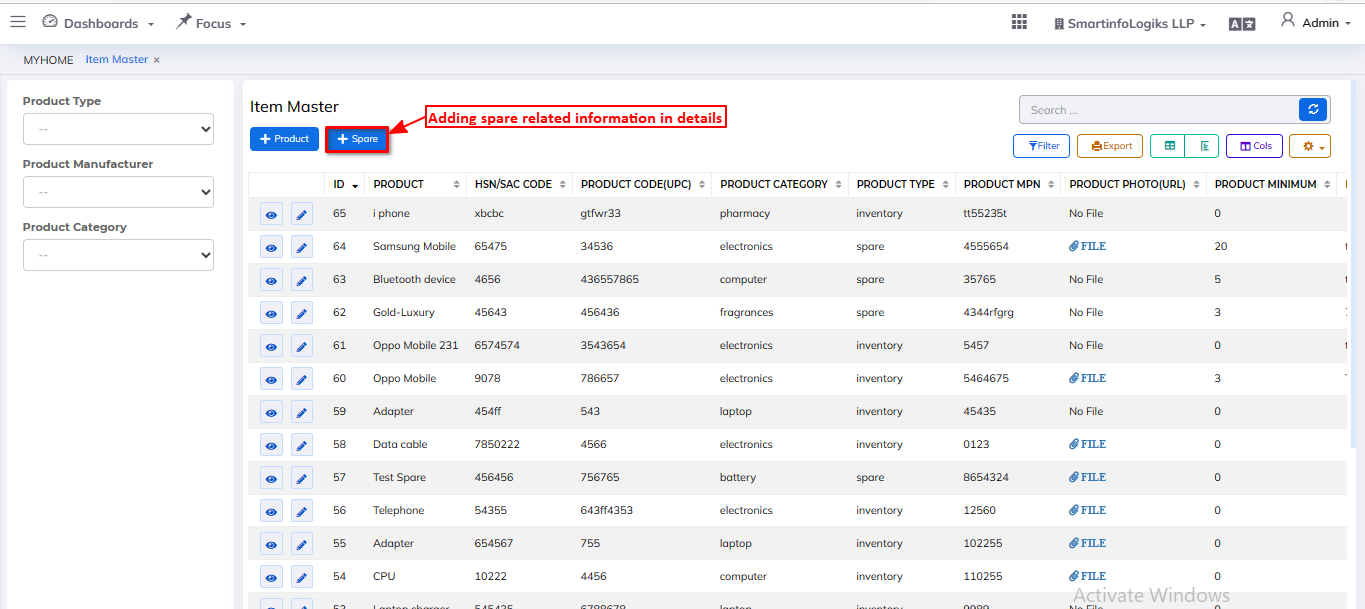
Item Master
- An Item master is a collection of records about a type of inventory item.
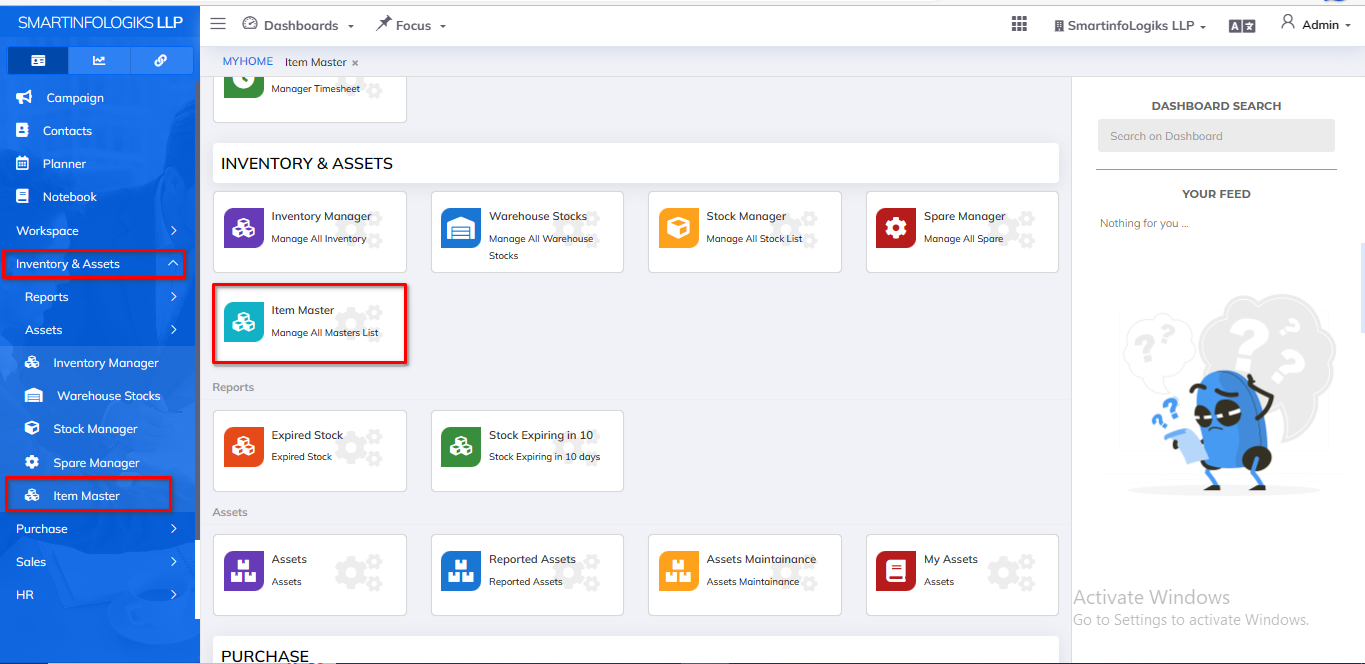
Dashboard:-
- Go to the Menu List.
- Click on Inventory & Assets Module
- Then Go to the Item Master tab.
- Item Master dashboard will be shown as below image:
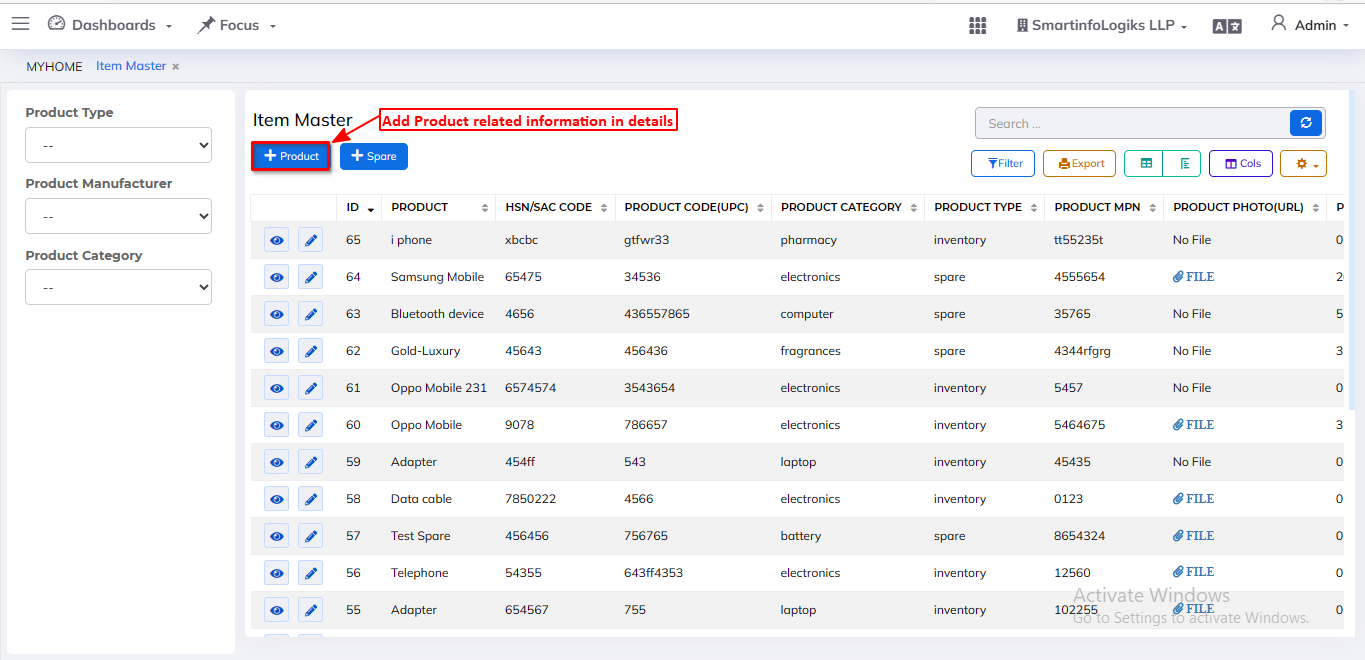
Product:
- Click on Inventory & Assets Module
- Then Go to the Item Master tab.
- Click on the + Product form to open it as per the below image.
- For product basic tab, form will open as per the below image.
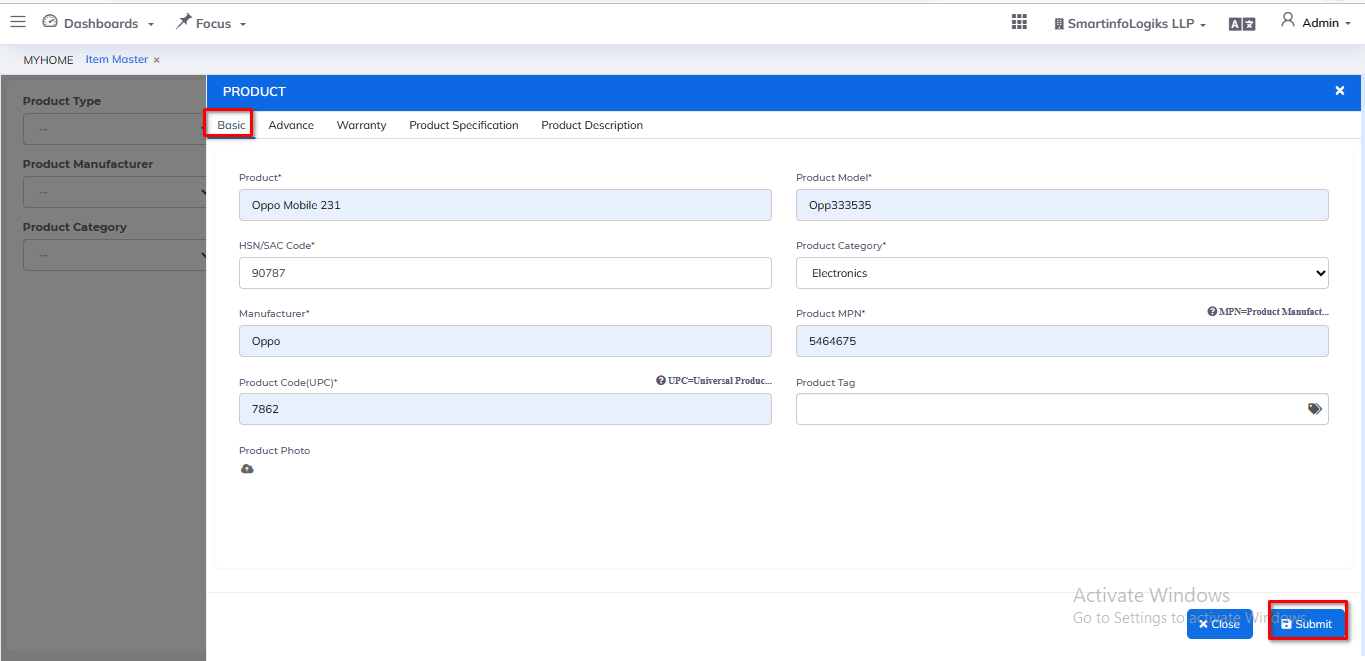
* Enter all required details.
1.Product: Enter the product name.
2.Product Model: Enter the product model.
3. HSN/SAC Code: Enter the product code.
4.Product category: select the product category using dropdown.
5.Manufacturer: Enter the manufacturer name.
6.Product MPN: Enter the product MPN
7.Product Code(UPC): Enter the Product code(UPC).
8.Product Tag: Enter the tag.
9.Product Photo: Attach the product photo.
- For product advance tab, form will open as per the below image.
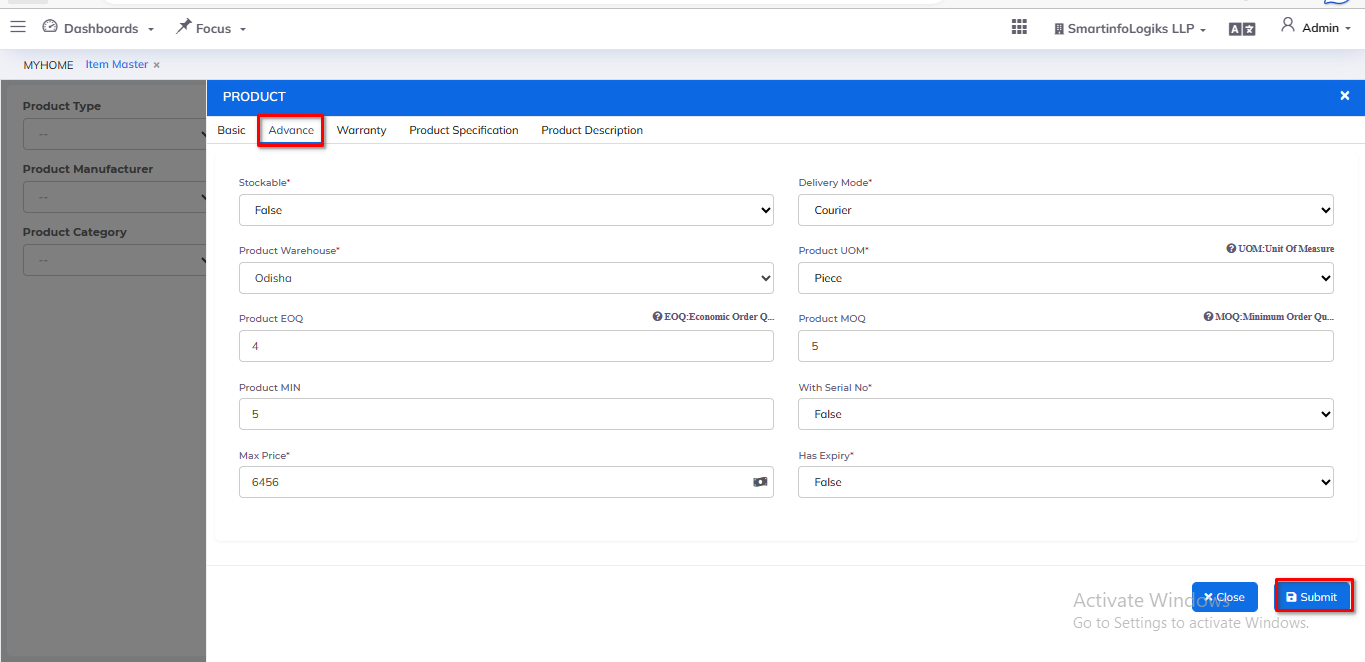
* Enter all required details.
1.Stockable : select the product Stockable using dropdown.
2.Delivery Mode: select the product delivery mode using dropdown.
3.Product Warehouse: select the product warehouse using dropdown.
4.Product UOM: select the product UOM(unit of measure) using dropdown
5.Product MOQ: Enter the Product MOQ.
6.Product MIN: Enter the Product Min.
7.With Serial No: Select the with serial no status with serial no.
8.Max Price: Enter the product Max price.
9.Has Expiry: Select the has expiry status using dropdown.
- For product Warranty tab, form will open as per the below image.
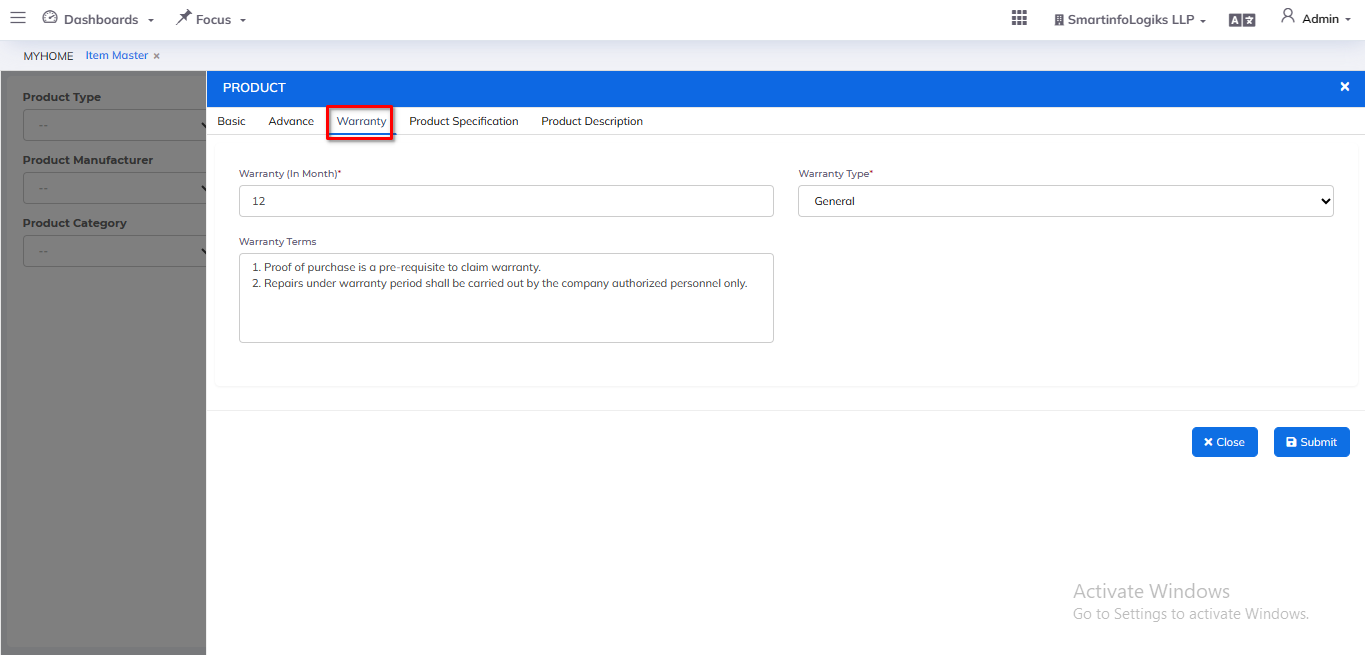
* Enter all required details.
1.Warranty Type: Select warranty type using dropdown.
2.Warranty Period: Select warranty period using dropdown.
3.Warranty Terms : Select warranty terms using dropdown.
- For product Specification tab, form will open as per the below image.
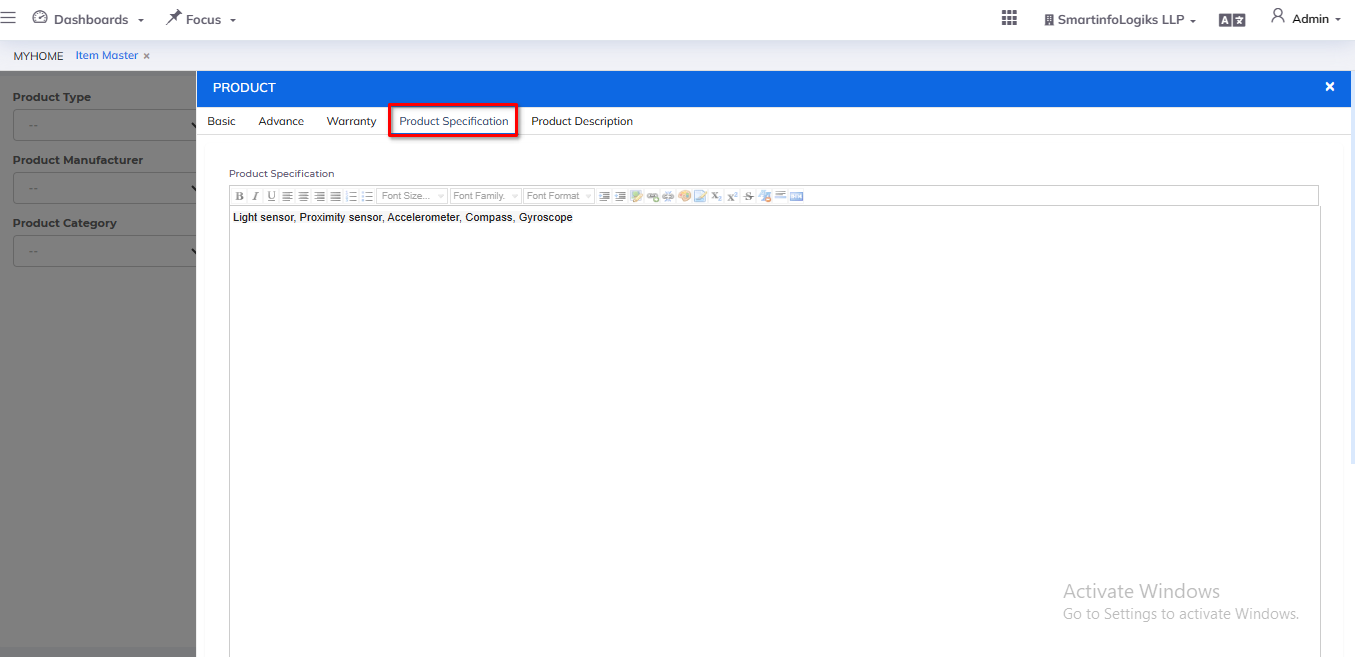
* Enter all required details.
1.Product Specification: Enter the Product specification details.
- For product Description tab, form will open as per the below image.
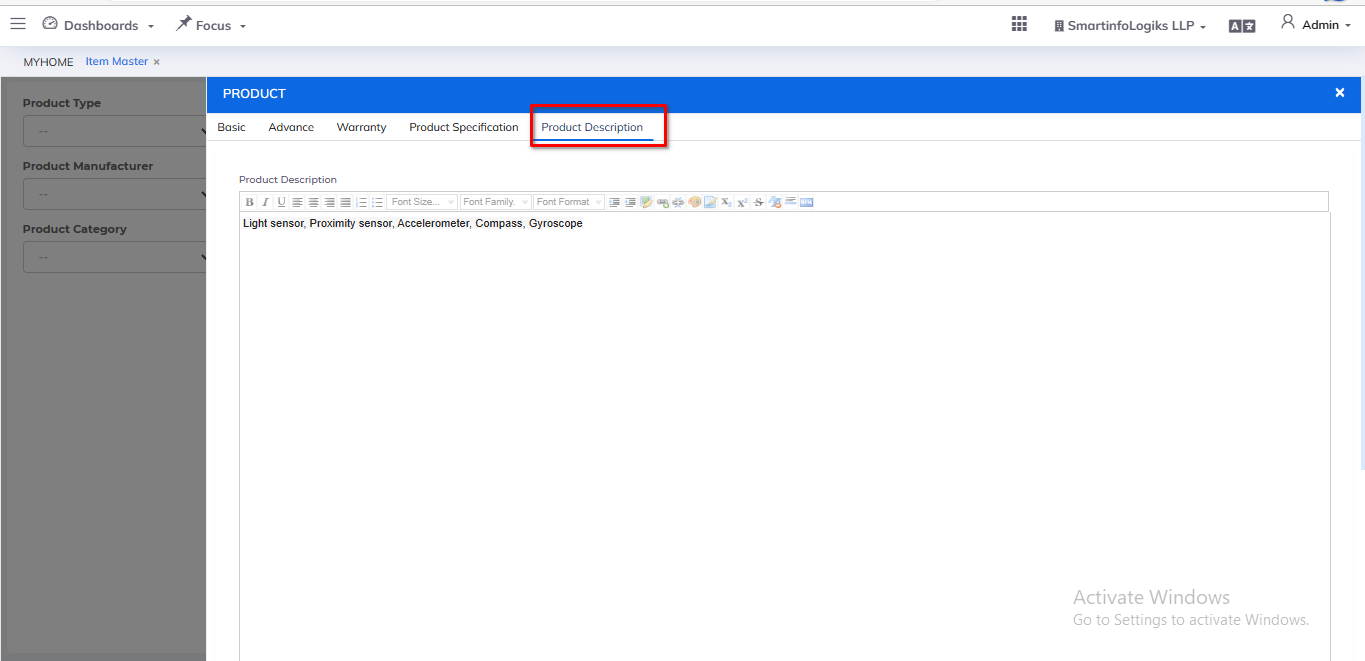
* Enter all required details.
1.Product Description: Enter the Product Description details.
- After filling all the mandatory fields click on the Submit button. On click of submit, reports will be added successfully.
- On click of the View icon, users can view the Product details.
On click of the Edit icon, users can edit the Product details.
Spare:
- Click on Inventory & Assets Module
- Then Go to the Item Master tab.
- Click on the + Spare form to open it as per the below image.
- For Spare Basic tab, form will open as per the below image.
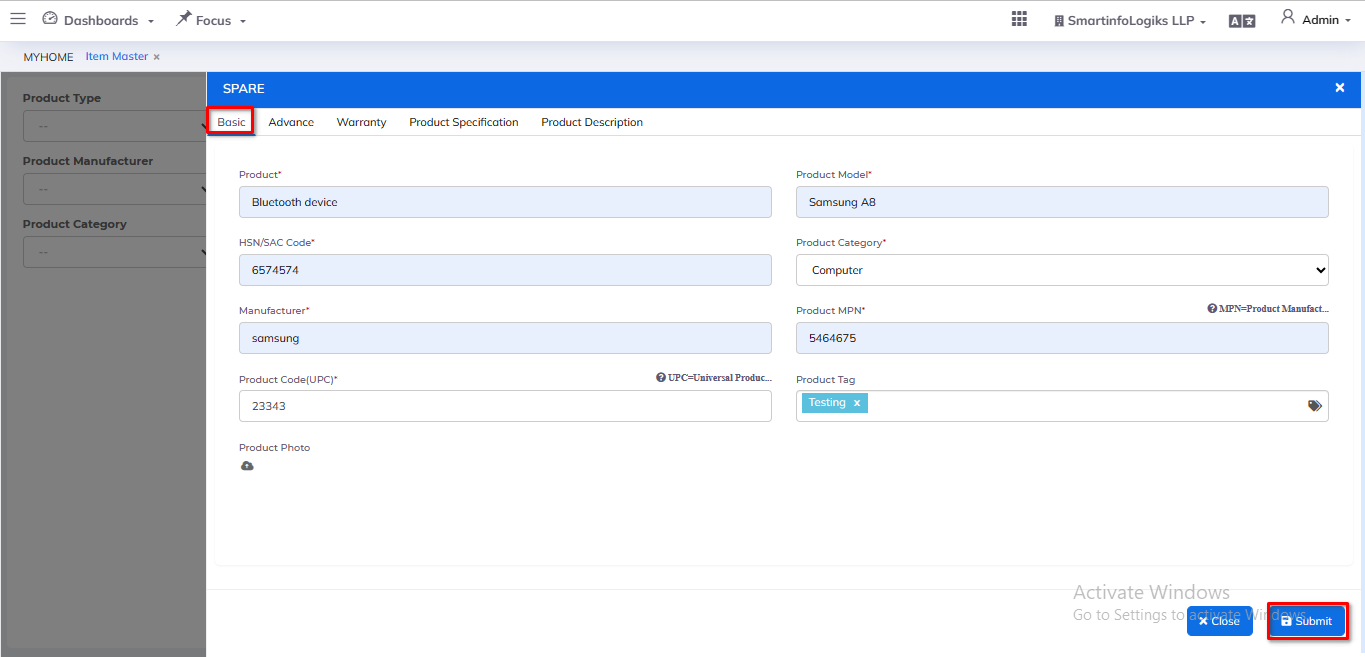
* Enter all required details.
1.Product: Enter the product name.
2.Product Model: Enter the product model.
3. HSN/SAC Code: Enter the product code.
4.Product category: select the product category using dropdown.
5.Manufacturer: Enter the manufacturer name.
6.Product MPN: Enter the product MPN
7.Product Code(UPC): Enter the Product code(UPC).
8.Product Tag: Enter the tag.
9.Product Photo: Attach the product photo.
- For Spare advance tab,form will open as per the below image.

* Enter all required details.
1.Stockable : select the product Stockable using dropdown.
2.Delivery Mode: select the product delivery mode using dropdown.
3.Product Warehouse: select the product warehouse using dropdown.
4.Product UOM: select the product UOM(unit of measure) using dropdown
5.Product MOQ: Enter the Product MOQ.
6.Product MIN: Enter the Product Min.
7.With Serial No: select the with serial no status with serial no.
8.Max Price: Enter the product Max price.
9.Has Expiry: Select the has expiry status using dropdown.
- For product Warranty tab, form will open as per the below image.
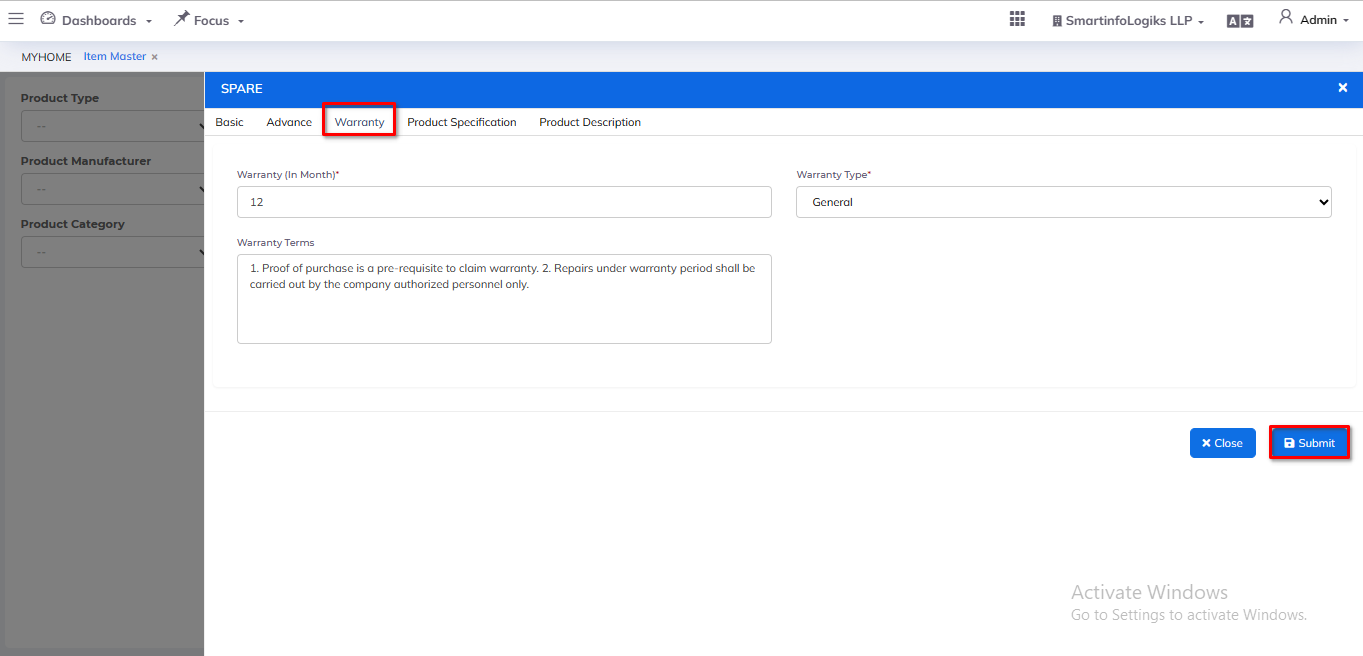
* Enter all required details.
1.Warranty Type: Select warranty type using dropdown.
2.Warranty Period: Select warranty period using dropdown.
3.Warranty Terms : Select warranty terms using dropdown.
- For product Specification tab, form will open as per the below image.
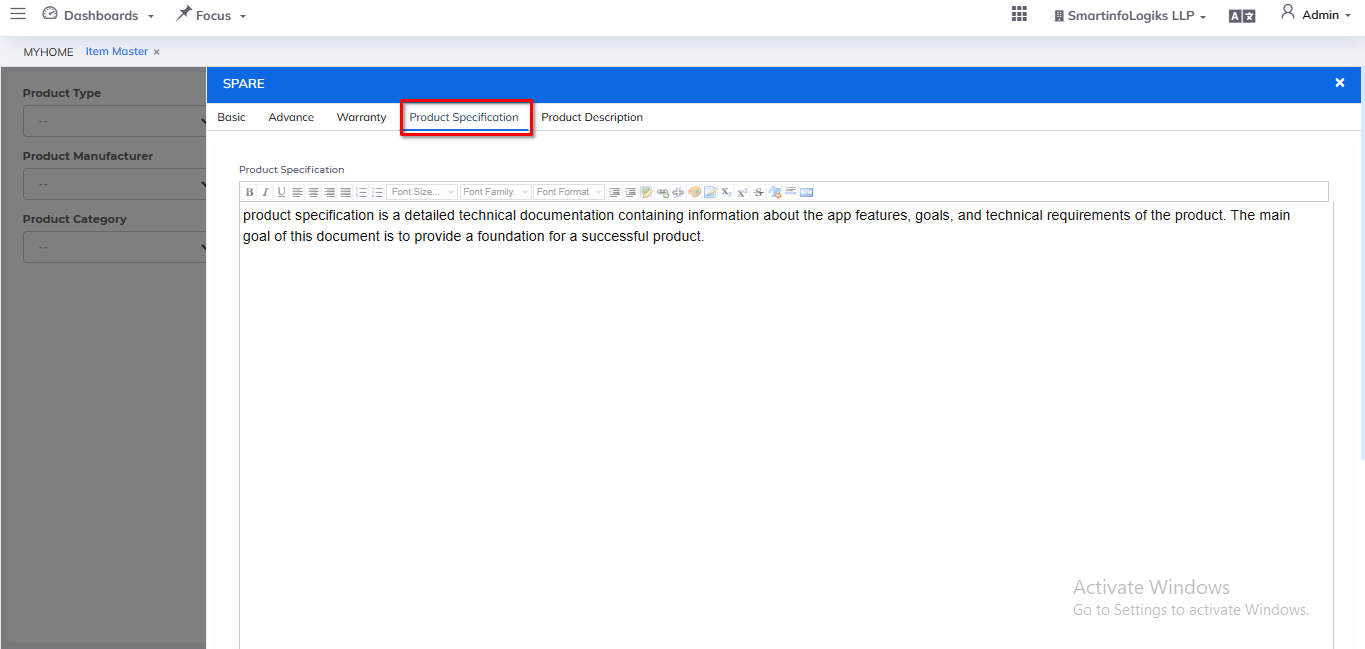
* Enter all required details.
1.Product Specification: Enter the Product specification details.
- For product Description tab, form will open as per the below image.

* Enter all required details.
1.Product Description: Enter the Product Description details.
- After filling all the mandatory fields click on the Submit button. On click of submit, reports will be added successfully.
- On click of the View icon, users can view the Spare details.
- On click of the Edit icon, users can edit the Spare details.