Inventory & Assets
- Inventory manager, a element of the supply chain, is the tracking of inventory from manufacturers to warehouses and from these facilities to a point of sale.
- The goal of inventory manager is to have the right products in the right place at the right time.
Dashboard:-
Steps: - Click on left side Menu List
- Click on Inventory & Assets
- Click on Inventory Manager tab.
- Inventory Manager's dashboard will be shown as below image:
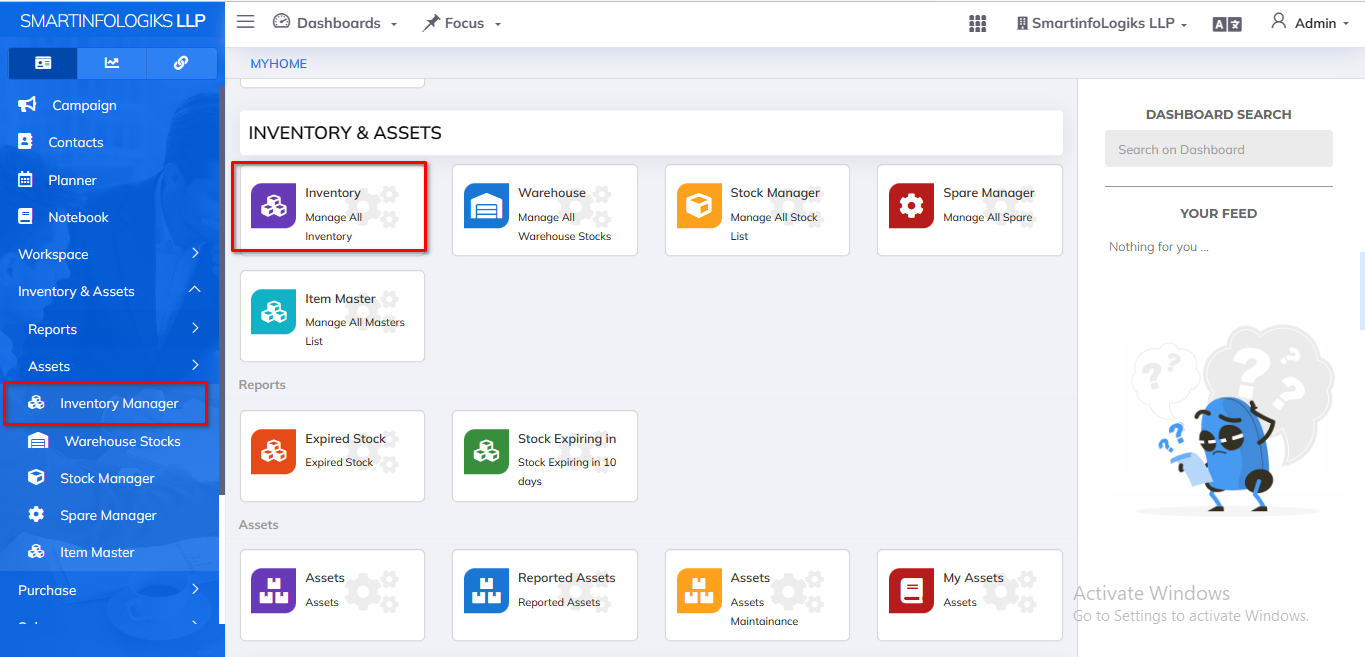
Inventory Manager:-
Steps:
- Click on Inventory & Assets tab
- Click on Inventory Manager tab
- Click on + Register Inventory
- Inventory Manager's Register will be shown as below image:
- Click on the + Register Inventory button Click on the Info tab
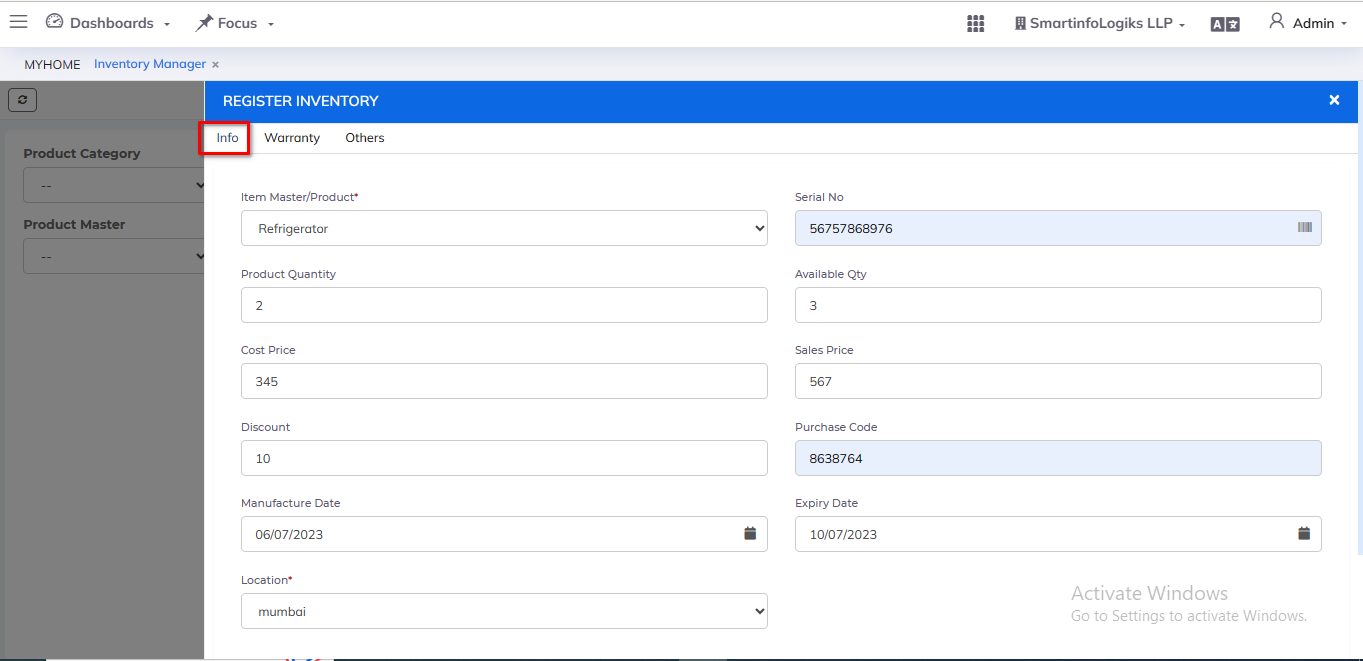
* Enter all required details.
1.Item master /Product: Select the Item master/ Product name using dropdown.
2.Serial No : Enter Serial no.
3.Product Quantity : Select product quantity using dropdown.
4.Available Quantity: Select available quantity using dropdown.
5.Cost Price: Select cost price using dropdown.
6.Sales price : Select sales price using dropdown.
7.Discount: Select the discount using dropdown.
8.Purchase code: Enter the purchase code.
9.Manufacture Date: Enter the manufacture date.
10.Expiry Date: Enter the Expiry date.
11.Location: Select the location using dropdown.
- Click on the + Inventory Register button
- In below, Click on theWarranty tab
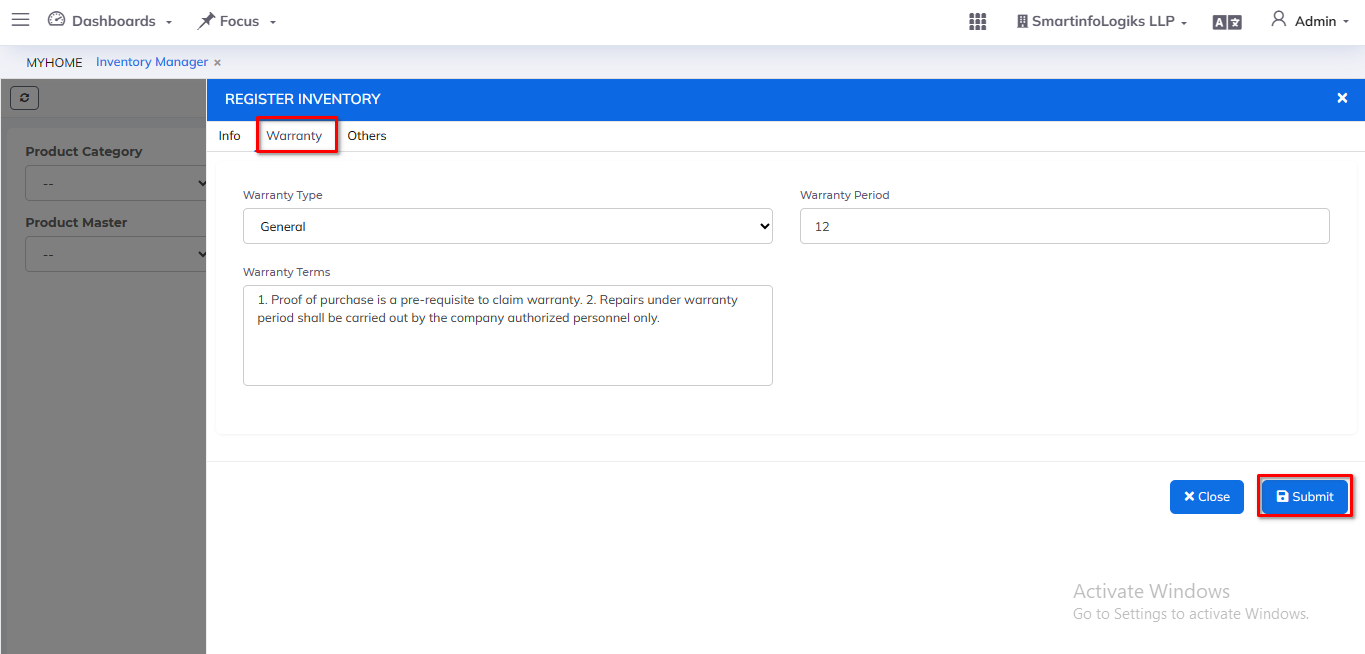
* Enter all required details.
1.Warranty type : Select the warranty type using dropdown.
2.Warranty period(In Month): Enter Warranty (In Month)
3.Warranty Terms: Select Warranty Terms using dropdown.
- Click on the +Inventory Register button In below, Click on the Others tab
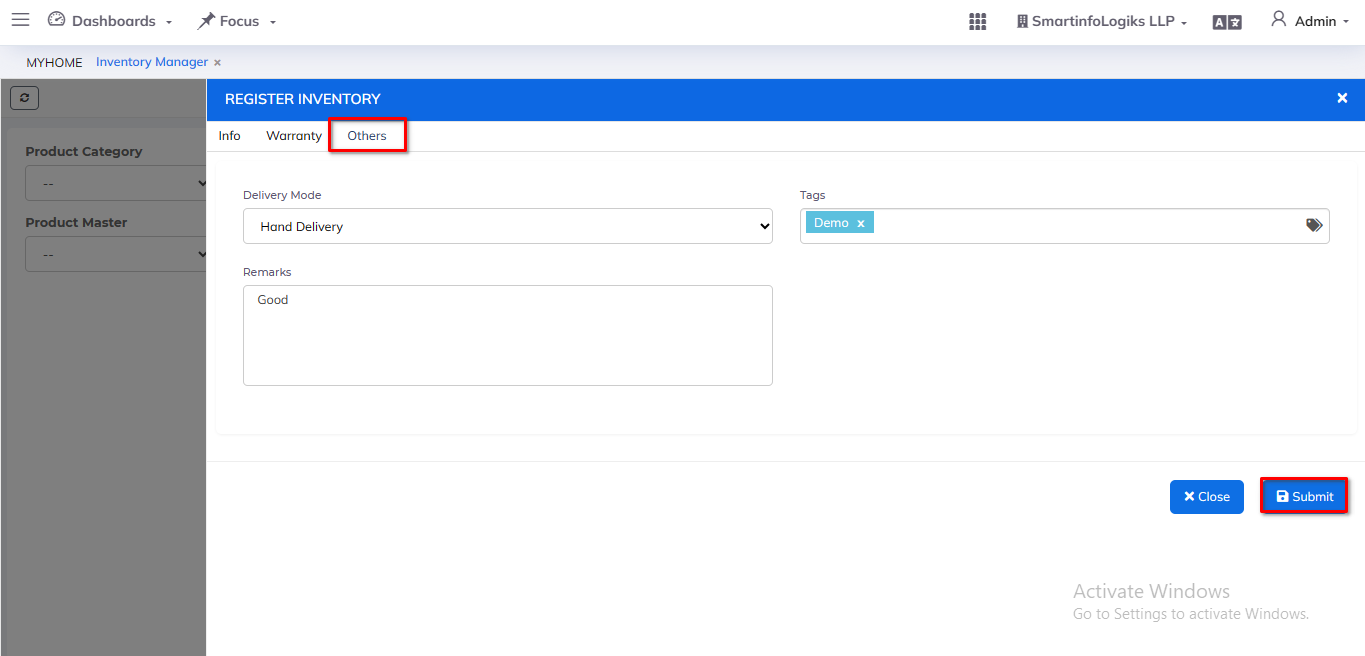
* Enter all required details.
1.Delivery Mode: Select the Delivery mode using dropdown.
2.Tags: Enter the tags
3.Remarks: Enter the Remarks.
- After filling all the mandatory fields click on the Submit button. On click of submit, the Product will be added successfully.
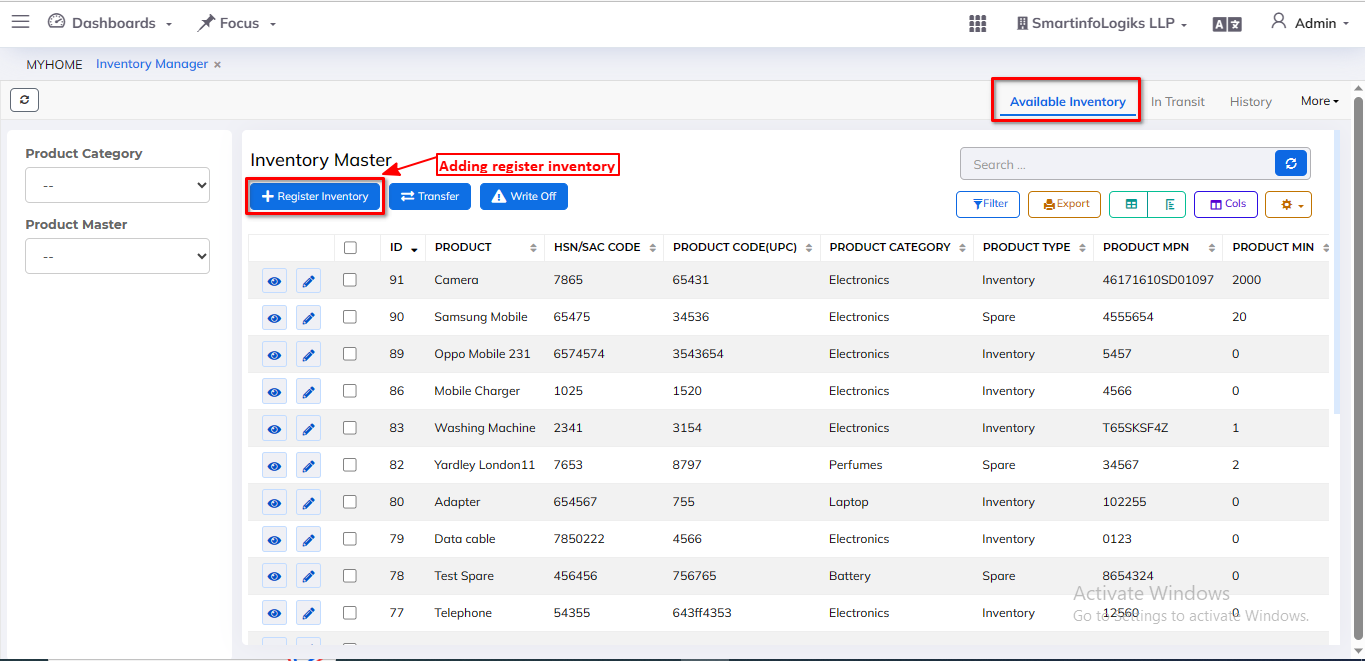
Available Inventory Tab:
Steps:
- Click on Inventory Manager tab
- Click on Available Inventory Tab
- Click on the Available inventory tab, reports will open as per the below image.
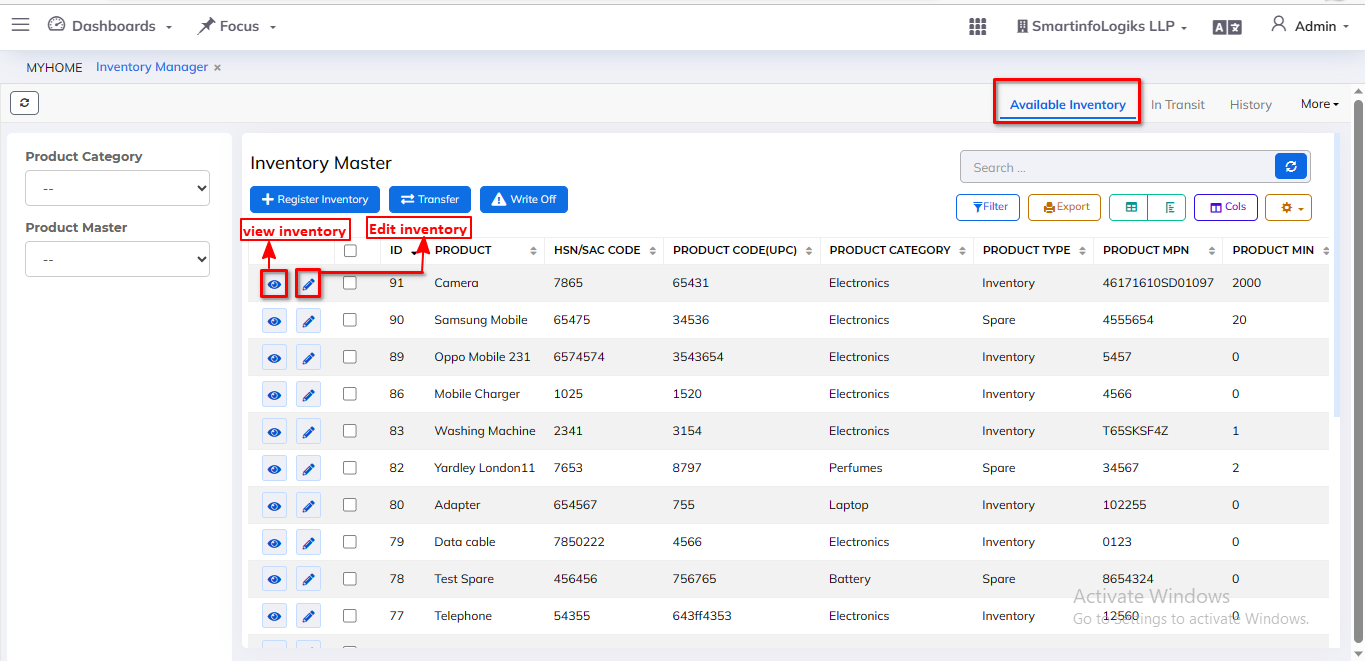
- Select the tab available inventory after filling out all of the needed fields.
- The Item master/Product Report successfully display the avilable inventory.
- After clicking the checkbox, the user can transfer an inventory record by clicking the in transit icon button on the transfer In Transit tab.
![]()
- On click of the View icon, users can View Inventory master details.
- On click of the Edit icon, users can Edit Inventory master details.
In Transit Tab:-
Steps:
- Click on Inventory Manager tab
- Click on In Transit Tab
- Click on the In Transit tab, reports will open as per the below image.
![]()
- Select the In Transit tab after filling out all of the needed fields.
- The Item master/Product Report successfully display the In Transit inventory.
- On click of the Receive Transfer icon, users can receive transfer details.
- On click of the Track Inventory icon, users can track inventory details.
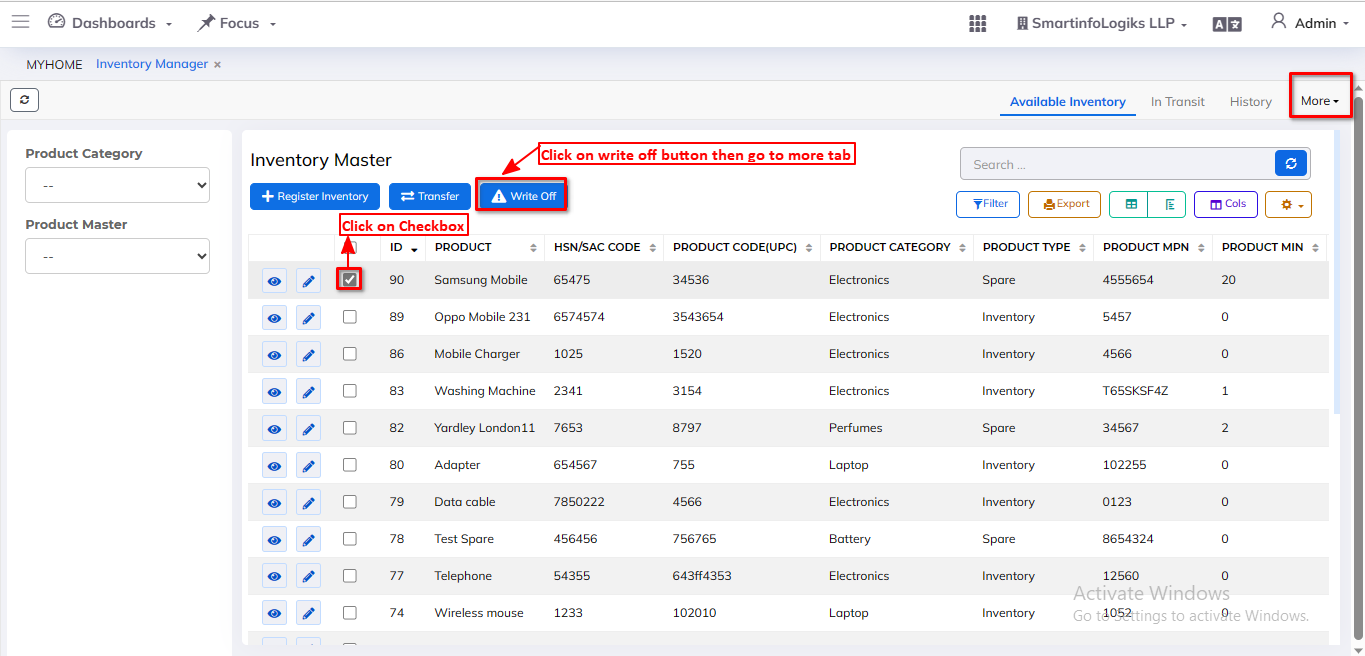
More-Written off Tab:
Steps:
- Click on Inventory Manager tab
- Click on More-Written off Tab
- Click on the More-Written off tab, reports will open as per the below image.

- On click of the View Write of items icon, users can write of items details.
- Select the more tab after filling out all of the needed fields. The Item master/Product Report successfully display the In Transit inventory.
- After clicking the checkbox, the user can transfer an inventory record by clicking the Writeoff icon button on the transfer More - Written off tab.
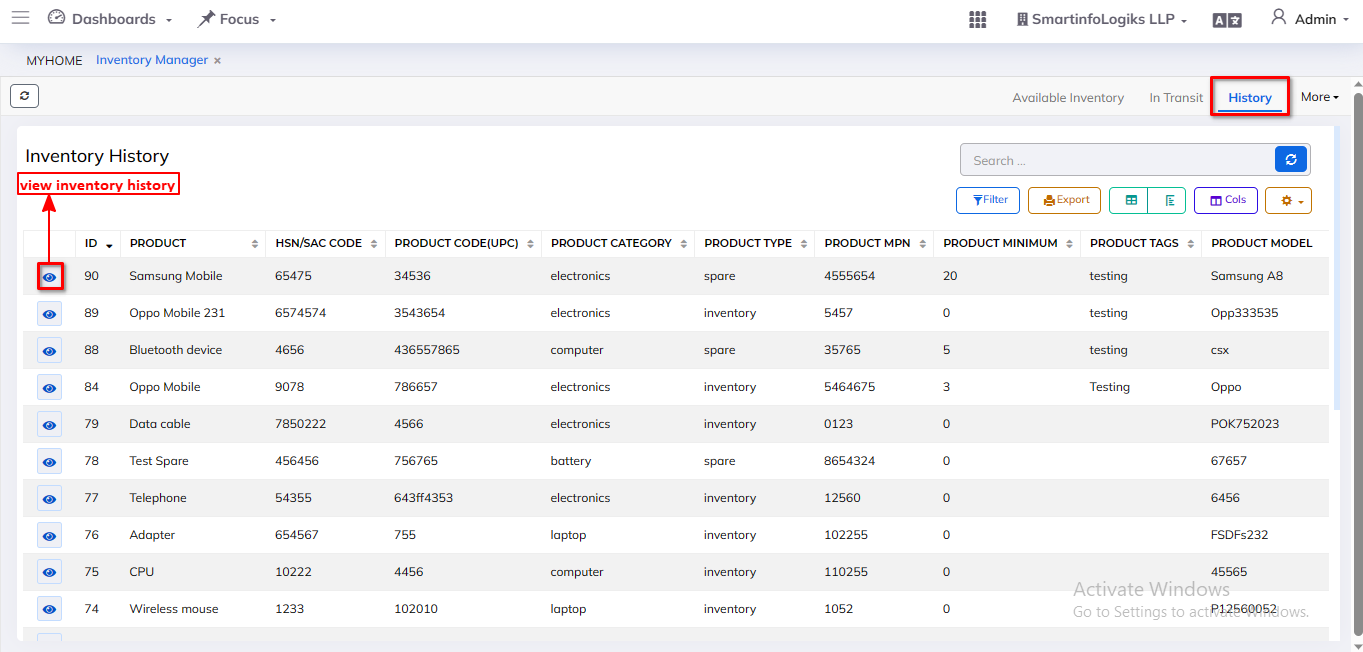
History Tab :
Steps: - Click on Inventory Manager tab
- Click on History Tab
- History tab gives the view of Previous Records that are already existing.
- One can view all data of Projects that are present & available.
- Inventory and Spare which are closed will get stored in the History tab.
- On click of the Inventory history icon, users can view history details.